Drywall Repair: Complete DIY & Professional Guide for 2026
2026-01-25
2026 drywall repair guide for GTA homeowners: fix holes, cracks, and water damage, compare DIY vs pro, tools, and costs.
Drywall damage is one of the most common home repair issues, from small nail holes to large water-damaged sections. Whether you're a homeowner tackling a DIY project or considering professional help, this comprehensive guide covers everything you need to know about drywall repair.
Need a local crew? We handle drywall repair in Mississauga, Oakville, Burlington, Milton, Hamilton, and Grimsby.
Table of Contents
- Types of Drywall Damage
- Tools & Materials
- Small Hole Repair
- Large Hole Repair
- Crack Repair
- Water Damage
- DIY vs Professional
- Costs & Pricing
Types of Drywall Damage
1. Small Holes (Less than 1 inch)
Common causes:
- Doorknob impacts
- Nail or screw holes
- Small furniture bumps
- Picture hanging mistakes
Repair difficulty: Easy (DIY-friendly) Time: 30 minutes - 1 hour Cost: $5-$20 (DIY)
2. Medium Holes (1-6 inches)
Common causes:
- Furniture impacts
- Moving accidents
- Plumbing access holes
- Electrical work
Repair difficulty: Moderate (requires patches) Time: 2-4 hours Cost: $20-$100 (DIY), $150-$300 (professional)
3. Large Holes (6+ inches)
Common causes:
- Major impacts
- Water damage
- Structural issues
- Renovation work
Repair difficulty: Challenging Time: 4-8 hours + drying Cost: $50-$150 (DIY), $300-$800 (professional)
4. Cracks
Common causes:
- House settling
- Temperature changes
- Foundation movement
- Poor initial installation
Types:
- Hairline cracks (cosmetic)
- Structural cracks (foundation issues)
- Corner cracks (framing movement)
Repair difficulty: Easy to moderate Time: 1-3 hours Cost: $10-$50 (DIY), $100-$400 (professional)
5. Water Damage
Common causes:
- Roof leaks
- Plumbing failures
- Flooding
- High humidity
Signs:
- Brown stains
- Soft, crumbling drywall
- Mold growth
- Peeling paint or texture
Repair difficulty: Moderate to challenging Time: 1-3 days Cost: $100-$500+ (professional recommended)
Tools & Materials Needed
Essential Tools (All Repairs):
- Utility knife - For cutting drywall
- Putty knives (3", 6", 10") - For applying compound
- Sanding block - 120-grit sandpaper
- Tape measure - Accurate measurements
- Pencil - Marking cuts
Small Hole Repairs:
- Spackling paste or joint compound
- Putty knife (3")
- Fine-grit sandpaper
- Primer and paint
Medium Hole Repairs:
- Self-adhesive mesh patch or California patch kit
- Joint compound (setting type recommended)
- Drywall tape
- Primer and paint
Large Hole Repairs:
- New drywall sheet (matching thickness)
- Furring strips or backer boards
- Drywall screws (1-1/4")
- Drywall saw
- Joint compound
- Drywall tape
- Drill/driver
Professional Tools:
- Automatic taper
- Corner bead crimper
- Drywall lift
- HEPA sander
- Mud mixer
Small Hole Repair (DIY Method)
Step-by-Step: Nail Holes & Dings
Time: 30 minutes + drying Difficulty: Easy
1. Clean the Area
- Remove loose debris
- Wipe with damp cloth
- Let dry completely
2. Apply Spackling
- Scoop small amount on putty knife
- Press into hole firmly
- Scrape smooth, slightly overfilled
3. Let Dry
- Wait 1-2 hours
- Check manufacturer instructions
4. Sand Smooth
- Use 120-grit sandpaper
- Sand until flush with wall
- Wipe away dust
5. Prime & Paint
- Apply primer (prevents flashing)
- Let dry (30 min - 1 hour)
- Paint to match wall
Pro tip: For multiple small holes, fill all at once, then sand and paint together for efficiency.
Medium Hole Repair (1-6 inches)
Method 1: Self-Adhesive Mesh Patch
Time: 2-3 hours + drying Difficulty: Moderate
1. Prepare the Hole
- Clean edges of loose debris
- Don't enlarge hole unnecessarily
- Ensure edges are firm
2. Apply Mesh Patch
- Peel backing off adhesive mesh
- Center over hole
- Press firmly around edges
3. First Coat - Joint Compound
- Apply thin layer over patch
- Extend 2-3 inches beyond patch
- Let dry 4-6 hours
4. Second Coat - Feather Edges
- Apply second, wider coat
- Feather edges 6-8 inches
- Let dry overnight
5. Third Coat - Final Smoothing
- Apply thin final coat
- Blend with surrounding wall
- Let dry completely
6. Sand & Finish
- Sand with 120-grit paper
- Wipe dust with damp cloth
- Prime and paint
Method 2: California Patch (No Backing)
Best for: Holes without accessible backing
Time: 2-4 hours + drying Difficulty: Moderate-Advanced
1. Cut Square Patch
- Measure hole
- Cut drywall square 2" larger
- Score back of drywall 1" from edges
2. Snap Off Extra Drywall
- Leave paper facing intact
- Creates paper border around patch
3. Trace & Cut Wall
- Trace patch onto wall
- Cut wall opening to match
- Remove damaged drywall
4. Install Patch
- Apply joint compound to back of paper
- Press patch into opening
- Smooth paper edges flat
5. Mud, Tape & Finish
- Apply joint compound
- Let dry and sand
- Repeat 2-3 times
Large Hole Repair (6+ inches)
Professional Method: Full Backing
Time: 4-8 hours + drying Difficulty: Advanced
1. Cut Square Opening
- Mark rectangle around damage
- Cut with drywall saw
- Remove damaged section
- Expose studs if possible
2. Install Backing
Option A: Studs Available
- Screw patch directly to studs
Option B: No Studs (Floating Patch)
- Cut furring strips 6" longer than hole
- Slide behind drywall top and bottom
- Screw through drywall into strips
3. Cut & Install Patch
- Measure opening precisely
- Cut new drywall to fit
- Install with 1-1/4" screws
- Screw heads slightly recessed
4. Tape Seams
- Apply joint compound
- Embed paper drywall tape
- Smooth with putty knife
- Let dry 4-6 hours
5. Apply Multiple Coats
First coat: Cover tape, fill screw holes Second coat: Wider, feather edges Third coat: Final smoothing
Each coat must dry completely (4-24 hours)
6. Sand & Finish
- Sand with 120-grit, then 220-grit
- Prime entire repair area
- Apply texture if needed
- Paint to match
Pro tip: Feathering edges 12-18 inches beyond repair makes patches invisible.
Crack Repair Guide
Hairline Cracks
Time: 1 hour + drying Difficulty: Easy
- Widen crack slightly with utility knife (creates V-groove)
- Fill with joint compound or paintable caulk
- Smooth flush with putty knife
- Sand, prime, and paint
Recurring Cracks (Structural)
Warning signs:
- Crack returns after repair
- Grows wider over time
- Doors/windows stick
- Floor slopes
Action: These indicate foundation or framing issues. Call a structural engineer before cosmetic repair.
Corner Cracks
Common cause: House settling or poor corner bead installation
Repair:
- Remove old corner bead if damaged
- Install new metal corner bead
- Apply 3 coats joint compound
- Sand smooth and paint
Water Damage Repair
Warning: Critical First Steps
Before repairing water-damaged drywall:
- Find and fix the leak source
- Roof inspection
- Plumbing check
- HVAC assessment
- Test for mold
- Visible mold = professional removal
- Hidden mold testing available
- Ensure complete drying
- Use fans and dehumidifiers
- May take 3-7 days
- Use moisture meter to confirm
When to Replace vs. Repair
Replace if:
- Soft or crumbling
- Visible mold growth
- Sagging or deformed
- Strong musty odor
May repair if:
- Only staining present
- Drywall still firm
- No mold detected
- Small affected area
Water Stain Removal
- Seal with stain-blocking primer
(Kilz or Zinsser BIN)
- Apply two coats for dark stains
- Paint to match wall color
Important: Never paint over water stains without primer. Stains will bleed through.
DIY vs. Professional Repair
When DIY Makes Sense:
- Small holes (less than 1")
- Hairline cracks
- Single nail holes
- No water damage
- You have time and tools
- Cosmetic, not structural
When to Hire a Professional:
- Water damage present
- Mold suspected
- Large holes (8"+)
- Multiple repairs needed
- Ceiling repairs
- Recurring cracks
- Texture matching required
- After popcorn ceiling removal
- Structural concerns
Benefits of Professional Repair
At EPF Pro Services, professional repairs include:
- Perfect texture matching - Invisible repairs
- Proper moisture remediation - Prevents mold
- Structural assessment - Identifies underlying issues
- Fast completion - Days vs. weeks DIY
- Warranty coverage - 3-year guarantee
- Professional finish - Paint-ready smooth
Costs & Pricing (2025 Ontario)
DIY Costs:
Small repair kit: $10-$30
- Spackling
- Putty knife
- Sandpaper
- Primer
Medium repair kit: $30-$75
- Joint compound
- Mesh patches
- Taping knife
- Paint
Large repair kit: $50-$150
- Drywall sheets
- Screws
- Tape
- Compound
- Tools
Professional Pricing (Burlington/Oakville/Hamilton):
Small holes: $75-$150 per hole Medium holes: $150-$300 per patch Large holes: $300-$800 per repair Ceiling repairs: +25-50% (difficulty) Texture matching: +$50-$200 Water damage: $200-$1,000+ (depends on extent)
Full room repair: $500-$2,500
Cost Factors:
- Size of damage
- Number of repairs
- Ceiling vs. wall (ceilings cost more)
- Texture matching required
- Water damage extent
- Accessibility (high ceilings, furniture)
- Painting included or separate
Common Mistakes to Avoid
1. Skipping Primer
Paint applied directly over repairs shows "flashing" - dull spots visible in certain light.
Solution: Always prime repairs before painting.
2. Not Feathering Edges
Visible lines around patch.
Solution: Extend each coat 2-4 inches beyond previous coat.
3. Rushing Between Coats
Wet sanding, cracking, or poor adhesion.
Solution: Wait full drying time between coats (4-24 hours).
4. Over-Sanding
Damages paper face, creates fuzzy texture.
Solution: Use light pressure, multiple passes.
5. Wrong Joint Compound
All-purpose compound shrinks in large repairs.
Solution: Use setting-type compound for holes 2"+.
6. Ignoring Water Source
Mold growth, recurring damage.
Solution: Always fix leak before repairing drywall.
7. DIY Complex Repairs
Poor finish, visible patches, wasted time.
Solution: Call professionals for large or multiple repairs.
Texture Matching Guide
Smooth Walls
Easiest to match. Multiple coats of joint compound + sanding creates invisible repair.
Orange Peel (Most Common)
DIY: Use texture gun or "hopper" sprayer Professional: Matched perfectly with commercial equipment
Knockdown Texture
Process:
- Apply texture spray
- Let dry 10-15 minutes
- Knock down high spots with trowel
Professional recommended - timing is critical
Skip Trowel
DIY difficulty: Very challenging Professional recommended: Yes - requires experience
Pro tip: Save leftover texture from original application for future repairs.
Preventing Future Damage
1. Install Door Stops
Prevents doorknob holes - the #1 cause of drywall damage.
2. Use Wall Anchors Properly
- Drywall anchors for lightweight items
- Find studs for heavy items (TVs, shelves)
- Never overload drywall
3. Address Foundation Issues
Settling causes recurring cracks. Fix foundation = stop cracks.
4. Maintain Proper Humidity
- Keep at 30-50% RH
- Prevents cracking and mold
- Use dehumidifiers in basements
5. Fix Leaks Immediately
Water is drywall's enemy. Address leaks within 24-48 hours.
6. Regular Inspections
Check for:
- New cracks or holes
- Water stains
- Nail pops
- Corner bead damage
Frequently Asked Questions
Can I paint directly over spackling?
No. Spackling absorbs paint differently than drywall, causing "flashing." Always prime first.
How many coats of joint compound do I need?
Minimum 3 coats for invisible repairs:
- First coat: Fill and tape
- Second coat: Build up and feather
- Third coat: Final smoothing
Large repairs may need 4-5 coats.
Why do my repairs keep cracking?
Possible causes:
- Not letting compound dry fully
- House settling (structural issue)
- Wrong type of compound
- Application too thick
Can I repair drywall myself or should I hire a pro?
DIY if:
- Small holes (under 2")
- You have 2-3 days
- Not water damaged
- Wall repair (not ceiling)
Hire professional if:
- Large damage
- Multiple repairs
- Water damage
- Ceiling work
- Texture matching needed
- Need it done fast
How long does drywall repair take to dry?
- Small holes: 1-2 hours per coat
- Medium/large: 4-24 hours per coat
- Full repair: 2-5 days minimum
- Humid conditions: Add 50% more time
How much does professional drywall repair cost?
Ontario 2025 pricing:
- Small holes: $75-$150
- Medium patches: $150-$300
- Large repairs: $300-$800
- Full room: $500-$2,500
Get accurate quote for your project
Can water-damaged drywall be repaired?
Sometimes. Replace if:
- Soft or crumbling
- Mold present
- Sagging
- Strong odor
Light staining can be sealed and painted.
Professional Drywall Repair Process
At EPF Pro Services, every drywall repair follows this proven process:
1. Assessment (Free)
- Identify all damage
- Check for structural issues
- Test moisture levels if applicable
- Provide detailed quote
2. Preparation
- Protect floors and furniture
- Set up dust containment
- Remove damaged drywall
- Address any water issues
3. Structural Repair
- Install backing as needed
- Secure loose sections
- Reinforce corners and edges
4. Drywall Installation
- Cut and install patches
- Secure with proper fasteners
- Ensure flush with existing wall
5. Taping & Mudding
- Apply tape to all seams
- Multiple coats joint compound
- Feather edges for invisibility
- Proper drying between coats
6. Sanding & Smoothing
- HEPA dust-free sanding
- Progressively finer grits
- Perfect smoothness
7. Priming & Texturing
- Seal with quality primer
- Match existing texture
- Professional finish
8. Final Inspection
- Quality check every repair
- Touch-ups as needed
- 3-year warranty
Why Choose EPF Pro Services
With 700+ completed projects in Burlington, Oakville, and Hamilton, we're the region's drywall repair experts.
Our Advantages:
- Invisible Repairs - Perfect texture matching
- HEPA Dust Control - Clean process
- Water Damage Experts - Proper remediation
- 3-Year Warranty - Guaranteed quality
- Licensed & Insured - Full protection
- Same-Day Quotes - Fast response
- 700+ Projects - Proven expertise
Service Areas:
Burlington | Oakville | Hamilton | Mississauga | Milton | Grimsby | Stoney Creek
Need Drywall Repair?
Don't let damaged walls diminish your home's appearance. Professional repairs deliver invisible results that last.
Get your free quote today:
- Call: (289) 427-5478
- Email: [email protected]
- Visit: Book Your Drywall Repair
Special offer: Mention this blog post for 10% off repairs over $500.
Related Services
Further Reading
About the Author: Alex has over 15 years of experience in drywall repair and finishing. As project manager at EPF Pro Services, he's completed 700+ successful drywall projects throughout Burlington, Oakville, and Hamilton.
Related local pages
Drywall repair service — Main drywall repair service page for the GTA.
Drywall repair in Mississauga — Local drywall repair services across Mississauga homes and condos.
Drywall repair in Oakville — Smooth wall and ceiling repairs for Oakville homes.
Drywall repair in Burlington — Patch, skim, and paint-ready drywall repair in Burlington.
Drywall repair in Milton — Drywall patching and finishing for Milton properties.
Drywall repair in Hamilton — Ceiling and wall repairs across Hamilton neighborhoods.
Drywall repair in Grimsby — Drywall fixes and finishing for Grimsby homes.
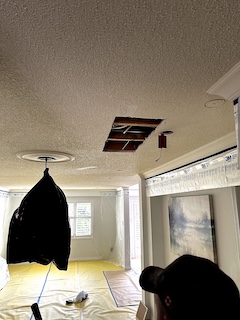
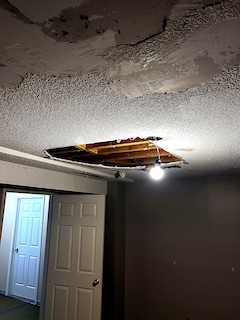
Field photos
Inspiration for your project

Mississauga ceiling terminology to know
Skim these phrases before you call so conversations with our crew stay clear and focused.
- drywall repair Mississauga
- drywall repair Oakville
- drywall repair Burlington
- drywall repair Hamilton
- drywall repair Milton
- drywall repair Grimsby
- drywall repair cost
- drywall repair guide 2026
Ready to plan your ceilings?
Get a popcorn ceiling quote today
Share photos, ceiling heights, and timing. We reply the same day with Mississauga, Oakville, and GTA availability.
• HEPA dust control and Level 5 skim finishing
• Pot-light coordination and interior painting add-ons
• Flexible scheduling for condos and single-family homes