
Painted Popcorn Ceiling: Should It Be Scraped, Skim Coated or Covered With Drywall?
Updated July 19, 2026
A three-option decision guide for choosing controlled scraping, skim coating, or new drywall over a painted popcorn ceiling.
- Trusted since 2005
- Fully insured
- Dust-controlled sanding
- Paint-ready finishing
- 3-year workmanship warranty
Quick Answer
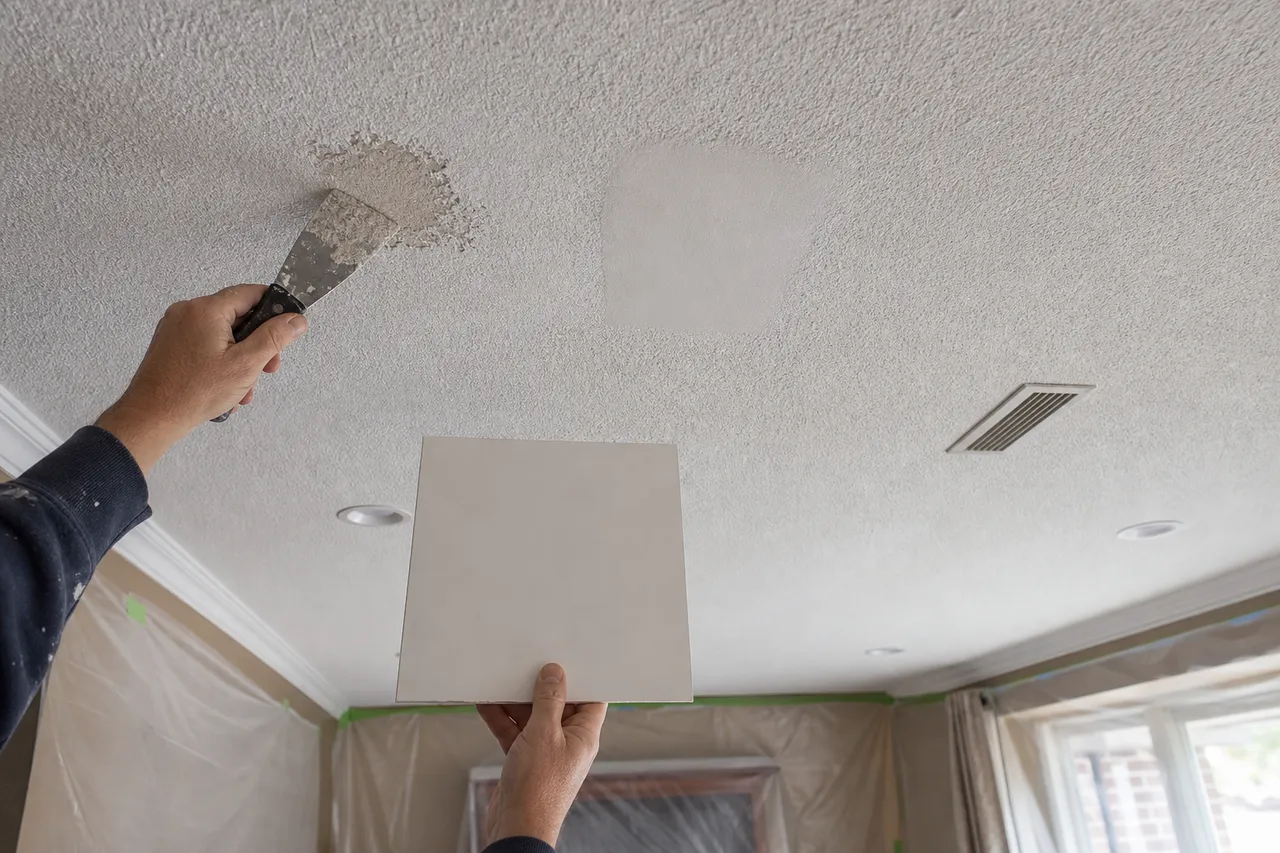
A lightly painted, well-bonded popcorn ceiling may still allow controlled scraping after testing. A stable but stubborn painted texture is often better prepared and skim coated. New drywall is usually reserved for badly damaged, very uneven, repeatedly painted, contaminated, or impractical-to-refinish ceilings. The right choice depends on adhesion, paint layers, substrate condition, fixtures, ceiling height, finish expectations, and safety testing—not paint alone.
A painted popcorn ceiling should be tested before choosing a method. If the coating softens and releases without destroying the drywall face, controlled scraping may be efficient. If paint has sealed a stable texture that resists removal, preparing and skim coating can avoid unnecessary substrate damage. If the ceiling is severely uneven, loose, multiply painted, or already compromised by extensive repairs, installing new drywall may create the most predictable new plane.
EPF’s popcorn ceiling removal and refinishing service assesses the complete path to a smooth painted ceiling. The decision is not simply whether painted popcorn can come off; it is which method gives that particular room a durable finish with reasonable labour and disruption.
Quick comparison: scrape, skim coat, or drywall
| Method | Best fit | Main trade-off |
|---|---|---|
| Controlled scraping | Texture releases in testing and substrate stays sound | Removal can become slow and irregular when paint blocks moisture |
| Prepare and skim coat | Texture is stable, bonded, and too stubborn to remove cleanly | Adds wet finishing, drying, sanding, and careful bond preparation |
| Cover with drywall | Ceiling is severely uneven, damaged, multiply coated, or impractical to refinish | Adds weight, changes fixture and trim relationships, and slightly reduces height |
Why paint changes the removal method
Unpainted texture often absorbs water and softens. Paint reduces that absorption and can bind the texture into a tougher skin. One ceiling may have a single thin coat that still releases after scoring and testing. Another may have several layers that make wet scraping ineffective. Different rooms in the same house can behave differently because they were painted at different times or with different products.
Aggressive scraping is not a neutral test. It can tear drywall paper, gouge joints, expose tape, and turn a removal project into a larger repair. The contractor should test a discreet location, observe how the coating releases, and inspect the substrate. The practical decision uses the amount of damage per square foot, not whether one small chip can technically be removed.
Paint can also hide stains, old patches, seam movement, and inconsistent texture. Once work starts, those conditions become part of the finish scope. If the ceiling is old enough that asbestos-containing material may be a concern, testing should occur before sanding, scraping, drilling, or otherwise disturbing it. A visual opinion cannot confirm asbestos content.
Option one: controlled scraping and refinishing
Scraping makes sense when tests show that the texture can be removed at a reasonable pace without widespread paper damage. The room is protected, fixtures and vents are addressed, and small sections are worked carefully. Painted surfaces may require more mechanical effort than unpainted texture, but the aim is still controlled removal—not force.
The advantage is that most of the texture thickness leaves the ceiling. That can reduce the amount of compound needed later and preserve ceiling height. It also exposes the original board and joints so weak tape, cracks, fastener pops, and old repairs can be corrected directly.
The limitation is unpredictability. Paint coverage may vary around windows, patches, kitchens, bathrooms, and previous touch-ups. One area can release while the next tears. If testing shows widespread damage, continuing to scrape may produce more labour and more repair than changing to a skim strategy.
Scraping should be avoided when the texture or substrate is unsafe to disturb, when adhesion varies so badly that the board face is being destroyed, or when the ceiling is already loose or moisture-damaged. Active leaks, soft board, mould concerns, and suspected hazardous material need proper investigation first.
Option two: prepare and skim coat the existing surface
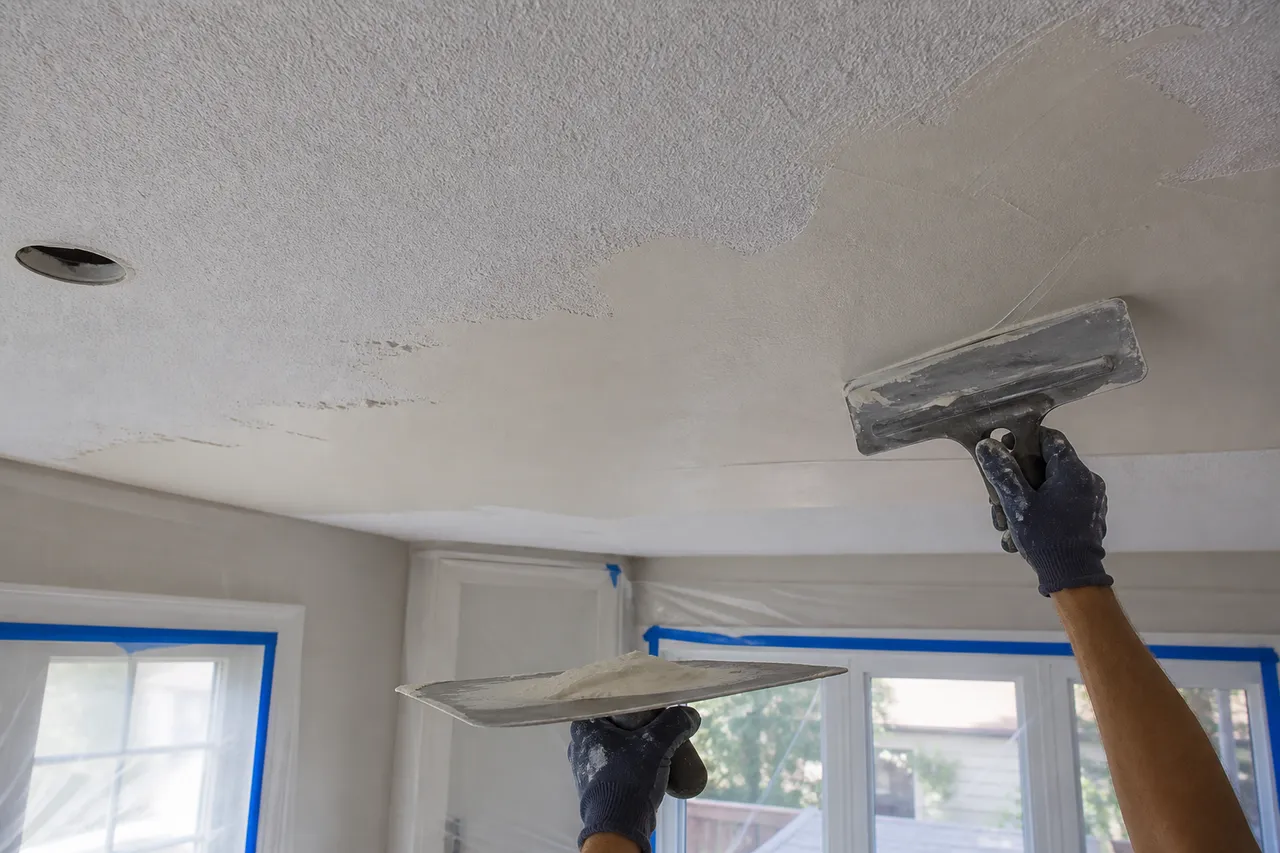
Skim coating can be the better choice when painted popcorn is strongly bonded and the ceiling is otherwise stable. The surface is cleaned and assessed, loose areas are removed, glossy or questionable coatings are prepared, and an appropriate bonding approach is selected. Compound is then applied in controlled passes to fill the texture and create a new flat plane.
This is not simply spreading mud over every popcorn ceiling. The existing texture must be sound enough to carry the new finish. Loose paint, chalking coatings, water damage, weak texture, and contamination can cause failure if buried. Deep texture can require more than one pass, and the broad wet area needs real drying time before sanding and primer.
Skim coating preserves most of the ceiling height and avoids adding full sheets overhead. It is useful in rooms where pot lights, vents, crown moulding, and cabinet clearances make new board complicated. It can also create a high-quality surface when successive coats are applied and checked under raking light.
Avoid this method when the existing ceiling lacks reliable adhesion, moves excessively, contains unresolved moisture damage, or would need so much build-up that a new substrate is more rational. A sample area can test bond and reveal whether the texture telegraphs through after drying.
Option three: install new drywall over or in place of the ceiling
New drywall creates a fresh plane when the old surface is too damaged or uneven to justify extensive removal and coating. In an overlay, sheets are fastened through the existing ceiling into verified framing, then joints, fasteners, corners, and fixture openings are finished. In more serious cases, the old ceiling may need to be removed so framing, insulation, moisture damage, or unsafe material can be addressed under the correct professional plan.
This option belongs inside a broader professional drywall installation assessment. Fastener length, framing location, ceiling loads, electrical boxes, fire separations, access panels, and transitions cannot be guessed from the room below.
The benefit is predictability. A properly installed sheet surface can bridge widespread cosmetic inconsistency and reduce dependence on the old texture as the finish base. It is often worth considering when multiple paint layers, extensive patching, sagging areas, or very deep texture would make skim work exceptionally heavy.
The trade-offs are real. Drywall reduces ceiling height by the board thickness plus finish build-up. Fixture boxes and pot-light trims may need adjustment. Vents, sprinkler heads, smoke alarms, fans, ceiling speakers, crown moulding, cabinets, and attic accesses must be evaluated. Added material, lifting, fastening, taping, drying, sanding, primer, and paint make it a full ceiling project rather than a quick cover-up.
Avoid overlaying a ceiling to conceal active leaks, loose material, structural movement, unknown electrical conditions, or hazards that should be investigated. Covering a problem does not resolve it. Multi-unit fire and acoustic assemblies may also have specific requirements that need competent review.
Send photos for a clearer scope
Send one wide photo per room plus close-ups of the texture, paint sheen, damage, lights, vents, crown moulding, and ceiling transitions so EPF can compare the three practical paths Request an EPF popcorn ceiling quote.
When each method makes sense—and when it does not
| Ceiling condition | Likely starting option | Reason to reconsider |
|---|---|---|
| Thin paint; test area releases cleanly | Controlled scraping | Paper tears or removal rate changes across the room |
| Firm, well-bonded painted texture | Preparation and skim coat | Adhesion test fails or deep texture needs excessive build |
| Extensive unevenness and old repairs | Drywall overlay assessment | Height, fixtures, trim, load, or assembly requirements conflict |
| Loose, wet, stained, or soft ceiling | Investigate and repair cause first | Do not bury an unresolved failure under any finish |
| Unknown older texture | Safety assessment or testing first | Do not disturb material until the risk is understood |
Ceiling height, pot lights, vents, and crown moulding
Scraping removes texture and changes height very little. Skim coating adds only a thin finish build when done correctly. Drywall overlay lowers the plane by the board thickness and compound system. That small change can matter at crown moulding, window heads, tall cabinets, closets, stair landings, and low basement ceilings.
Pot-light housings and trims need to work with the new ceiling plane. Electrical boxes cannot be left recessed beyond what the assembly allows, and fixtures must remain properly supported. Vents need collars and registers that meet the finished surface cleanly. Ceiling fans require appropriate support independent of finish board. A quote should state who handles electrical or HVAC adjustments and whether those trades are included.
Crown moulding can sometimes remain during scraping or skim coating, but protecting and cutting cleanly to it takes time. Overlaying may require removal, reinstallation, new build-out, or a changed reveal. Built-in cabinets that meet the ceiling also complicate overlay. These relationships are why a room photo is necessary even when the homeowner knows the square footage.
Protection, dust, labour, and duration
All three methods require protection. Scraping creates wet debris and can expose dust during repairs and sanding. Skim coating creates less removed texture but introduces broad wet work and substantial sanding unless application is controlled. Drywall installation brings large sheets, cutting, fastening, joint finishing, and repeated drying cycles.
No professional method is completely dust-free. Room isolation, floor and wall protection, vent control, clean access paths, HEPA-connected sanding, and daily cleanup reduce migration. Occupied homes, kitchens, open staircases, and rooms with fixed furniture take longer to protect than empty spaces.
Duration depends on more than the first method. Scraping may be fast but reveal extensive repair. Skim coating may avoid removal but needs multiple passes and drying. Drywall may install quickly with the right crew but still needs taped joints, successive coats, sanding, primer, inspection, and paint. The finish schedule should be compared from protected room to completed painted ceiling, not only by the demolition stage.
What happens after the texture is addressed
A scraped ceiling is rarely ready for paint immediately. It needs inspection, torn-paper sealing where appropriate, seam and fastener repair, skim coating as required, sanding, and dust removal. A skimmed ceiling needs full drying, controlled sanding, and inspection. A newly drywalled ceiling needs joint finishing over every seam and fastener.
Primer is the next quality gate. It equalizes porosity and reveals defects that raw compound hides. Small touch-ups may follow, then need sanding and spot priming. Flat ceiling paint is normally preferred because it reduces reflection, but strong windows and pot lights can still reveal waves or scratches. The method must therefore be chosen with the final lighting in mind.
Level 5 finishing may be worth discussing on broad, bright, smooth ceilings with strong raking light. It is not a magic label and not necessary in every small room. The contractor should connect finish expectations to the ceiling size, joints, paint sheen, natural light, and the homeowner’s tolerance for minor surface variation.
Decision table for a written quotation
| Factor | Scrape | Skim coat | Drywall |
|---|---|---|---|
| Paint layers | Best when tests still release | Works when paint and texture are bonded | Useful when layers make refinishing impractical |
| Existing damage | Exposes damage for direct repair | Suitable only over a stable base | Creates a new plane but underlying causes still need correction |
| Expected finish | Depends on repair and skim work after removal | Can create a high-quality smooth surface | Predictable substrate followed by full joint finishing |
| Relative labour | Variable and test-dependent | Broad wet finishing and sanding | Sheet handling, fastening, joints, and fixture details |
| Approximate sequence | Protect, test, scrape, repair, skim, sand, prime, paint | Protect, prepare, bond, skim, dry, sand, prime, paint | Assess, adjust details, board, tape, coat, dry, sand, prime, paint |
Photos needed for an EPF assessment
Send a wide photograph of each room from two angles and a close view of the texture. Add photos beside windows where light travels across the ceiling and around every pot light, pendant, fan, smoke alarm, vent, bulkhead, skylight, crown moulding, cabinet, access hatch, crack, stain, and old patch. Include room dimensions and ceiling height.
Tell us whether the texture is known to be painted and, if possible, when. Mention leaks, asbestos testing, previous scraping attempts, loose areas, condo rules, elevator access, furniture, and whether other trades are changing lighting or walls. Photos support an initial scope, but a test area and site assessment may still be necessary before selecting the final method.
Final recommendation
Choose scraping when the material releases cleanly enough to protect the substrate. Choose skim coating when painted texture is stable but stubborn and the existing ceiling can reliably carry a new finish. Consider drywall when widespread condition makes removal or skim build-up less predictable. Investigate moisture, movement, or hazardous-material concerns before choosing any cosmetic route.
This guide intentionally addresses the three-way decision rather than repeating whether painted texture can be removed. For background, use the existing guide to whether painted popcorn can be removed and when to scrape or skim coat. Then send room photos through the EPF popcorn-ceiling quote form for a project-specific assessment.
FAQ
Is it better to scrape or skim coat a painted popcorn ceiling?
Scrape when a test area releases at a reasonable rate without widespread drywall-paper damage. Skim coat when the painted texture is stable and strongly bonded but resists clean removal.
Can drywall be installed over a painted popcorn ceiling?
It can be an option after framing, fastening, load, fixture, fire-assembly, and underlying-condition checks. It should not be used to hide active leaks, loose material, or unresolved hazards.
Does skim coating over popcorn ceiling reduce ceiling height?
Only slightly when applied in controlled coats. A drywall overlay lowers the ceiling more because it adds board thickness plus the finish system.
Which painted popcorn ceiling option creates the least dust?
Every option creates some debris or sanding dust. Preparation, containment, HEPA-assisted sanding, and cleanup matter more than a dust-free claim. The amount varies with removal difficulty and finish work.
Do painted popcorn ceilings need asbestos testing?
Some older texture may contain asbestos. Age and appearance cannot confirm it, so appropriate testing should be considered before scraping, sanding, drilling, or other disturbance when the material history is uncertain.
Related local pages and guides
Keep Planning Your Project
popcorn ceiling removal and refinishing
Primary service page receiving authority from this comparison guide.
professional drywall installation
Contextual link used only for the drywall-covering option.
scrape or skim coat painted popcorn
Existing two-method supporting guide.
request a popcorn ceiling quote
Send ceiling photos and project details.
Field Photos
What the Work Can Look Like
Article Review
AuthorEPF Pro Services
Reviewed byEPF Pro Services
UpdatedJuly 19, 2026
Plan your drywall scope
Get a drywall quote today
Share photos, room sizes, and timing. We reply the same day with GTA drywall availability and a clearer written scope.
Quick next step