
Our Work · Dundas, Ontario
Heavy Texture Ceiling Removal and Replastering in Dundas
EPF Pro Services removed heavy ceiling texture, replastered the ceiling and completed a smooth finish in this Dundas, Ontario home. The project photos follow the same room from its raised decorative pattern through surface preparation to the finished ceiling.
By EPF Pro Services · Published
- Project location
- Dundas, Hamilton, Ontario
- Work completed
- Heavy texture removal and replastering
- Result
- Smooth finished ceiling
From a raised pattern to a smooth ceiling
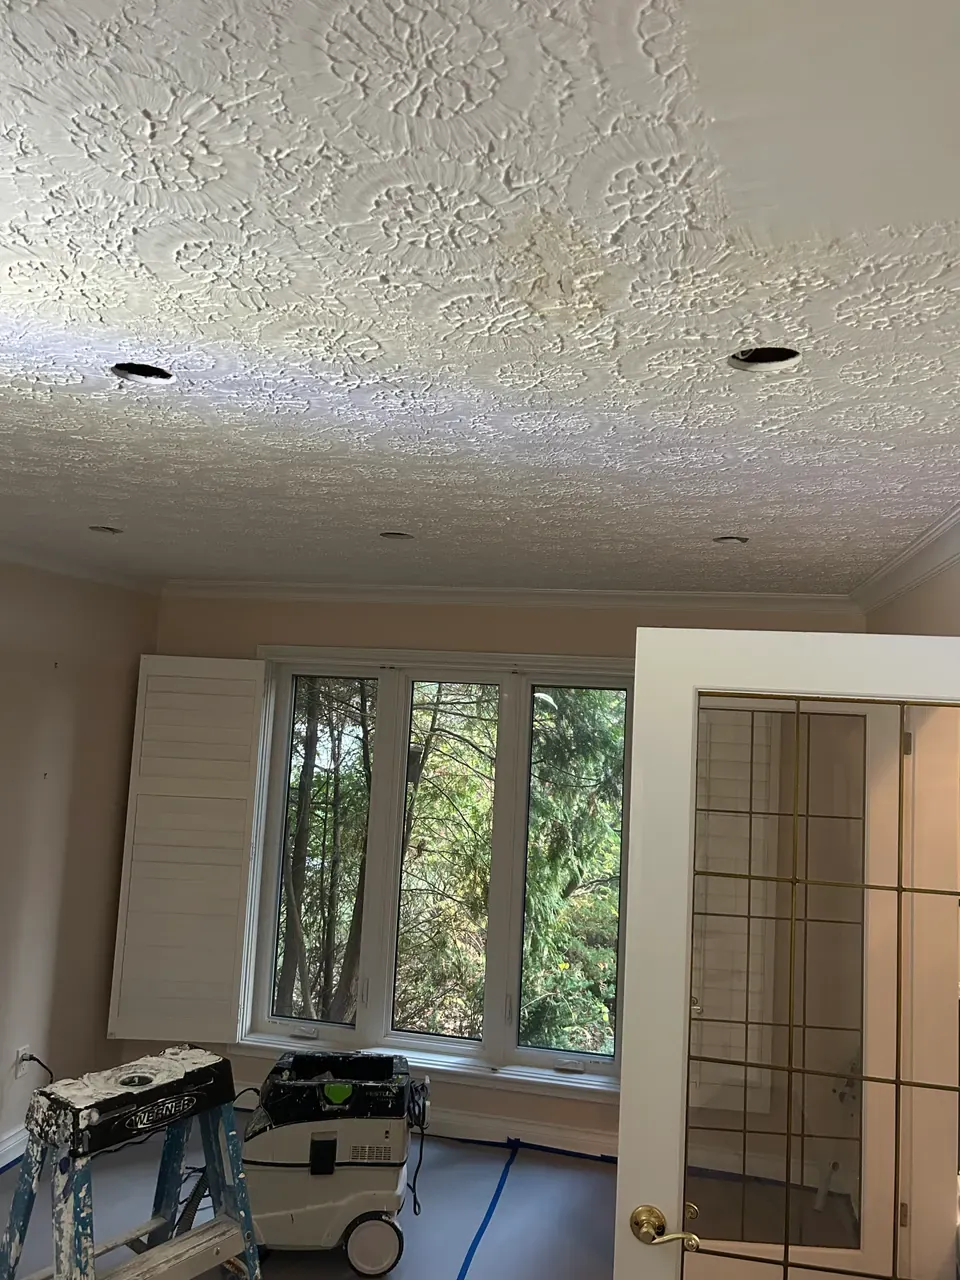
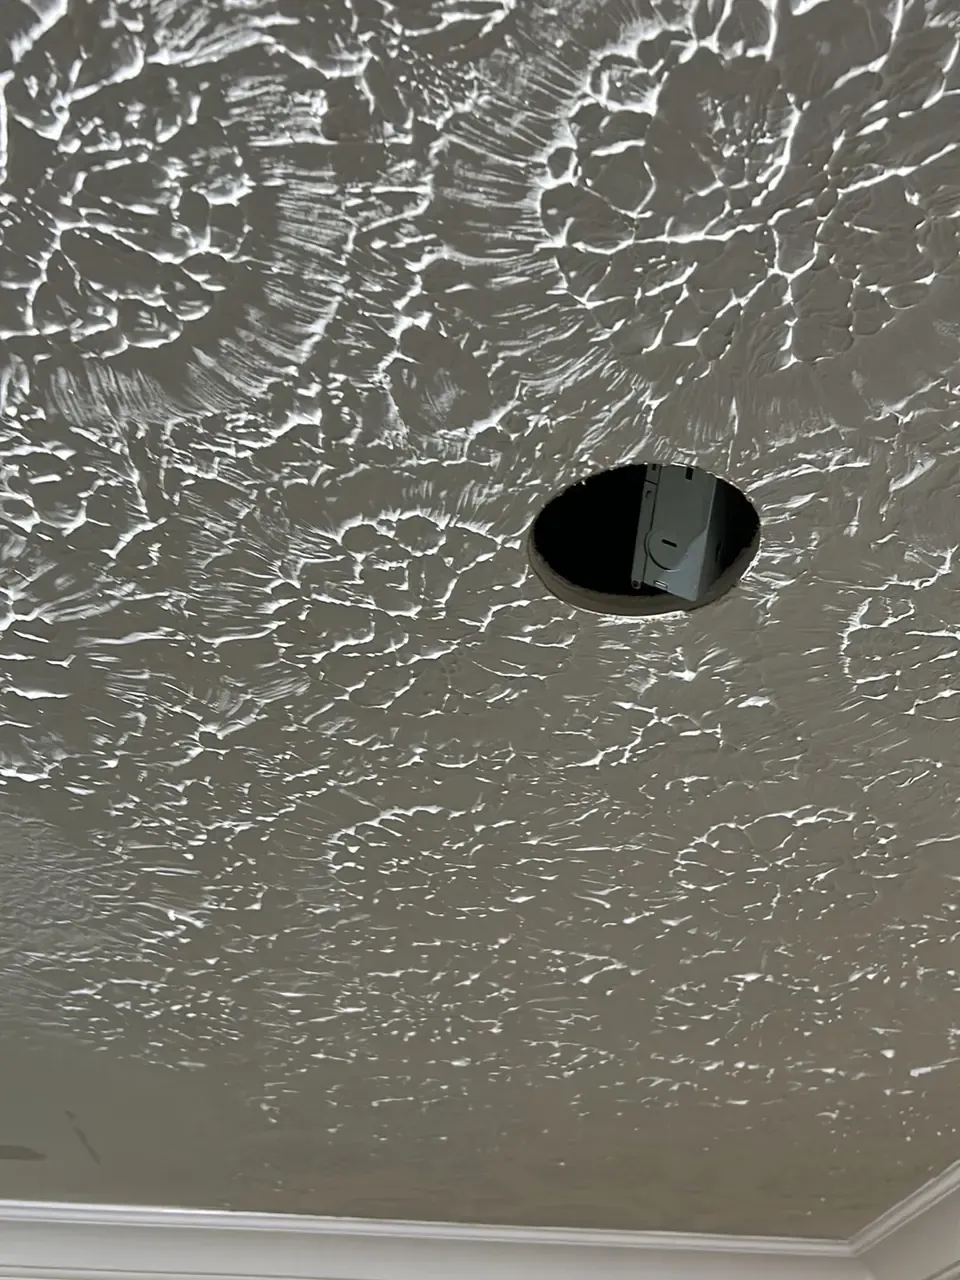
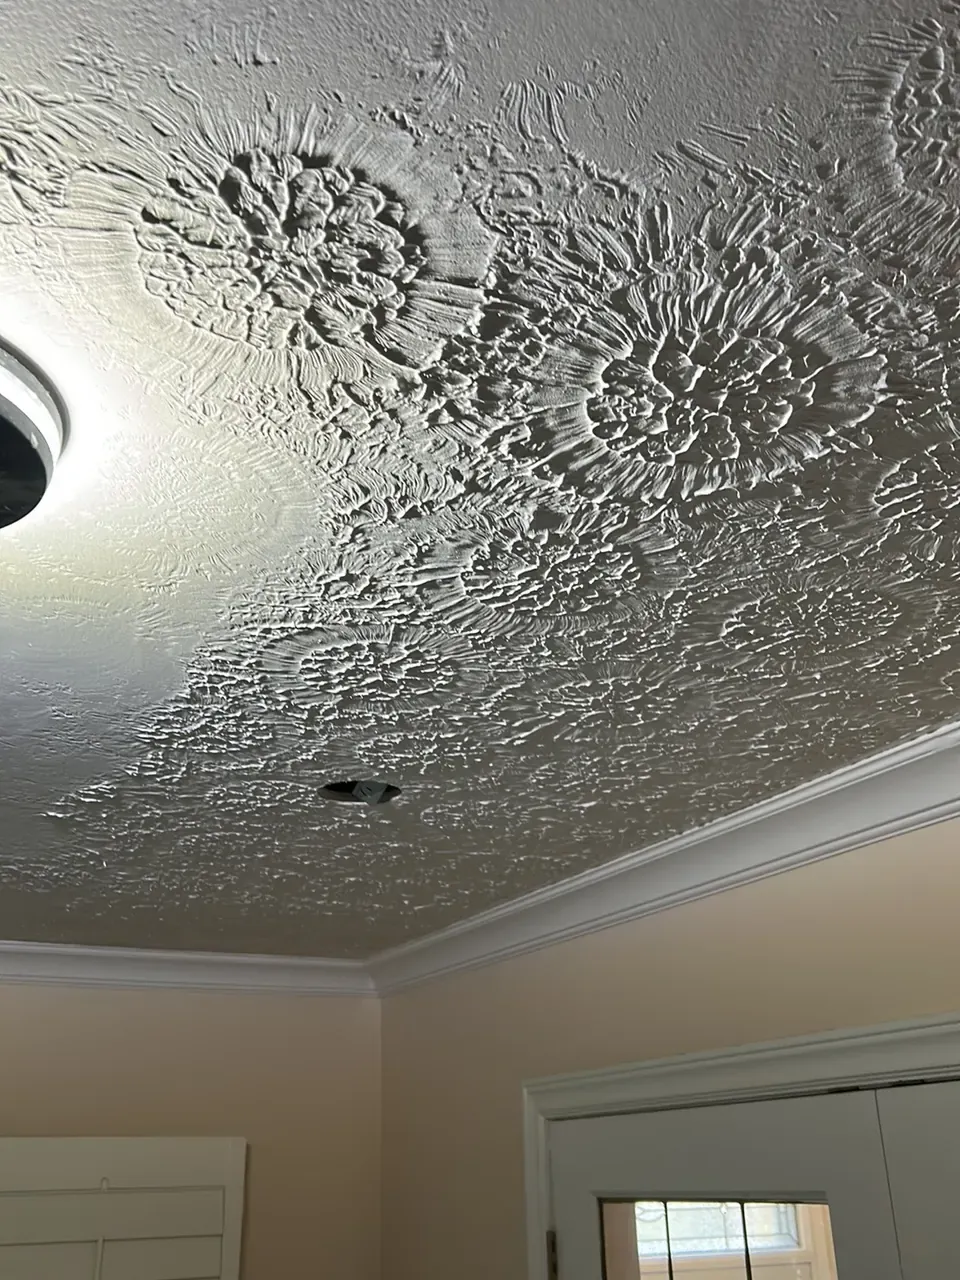
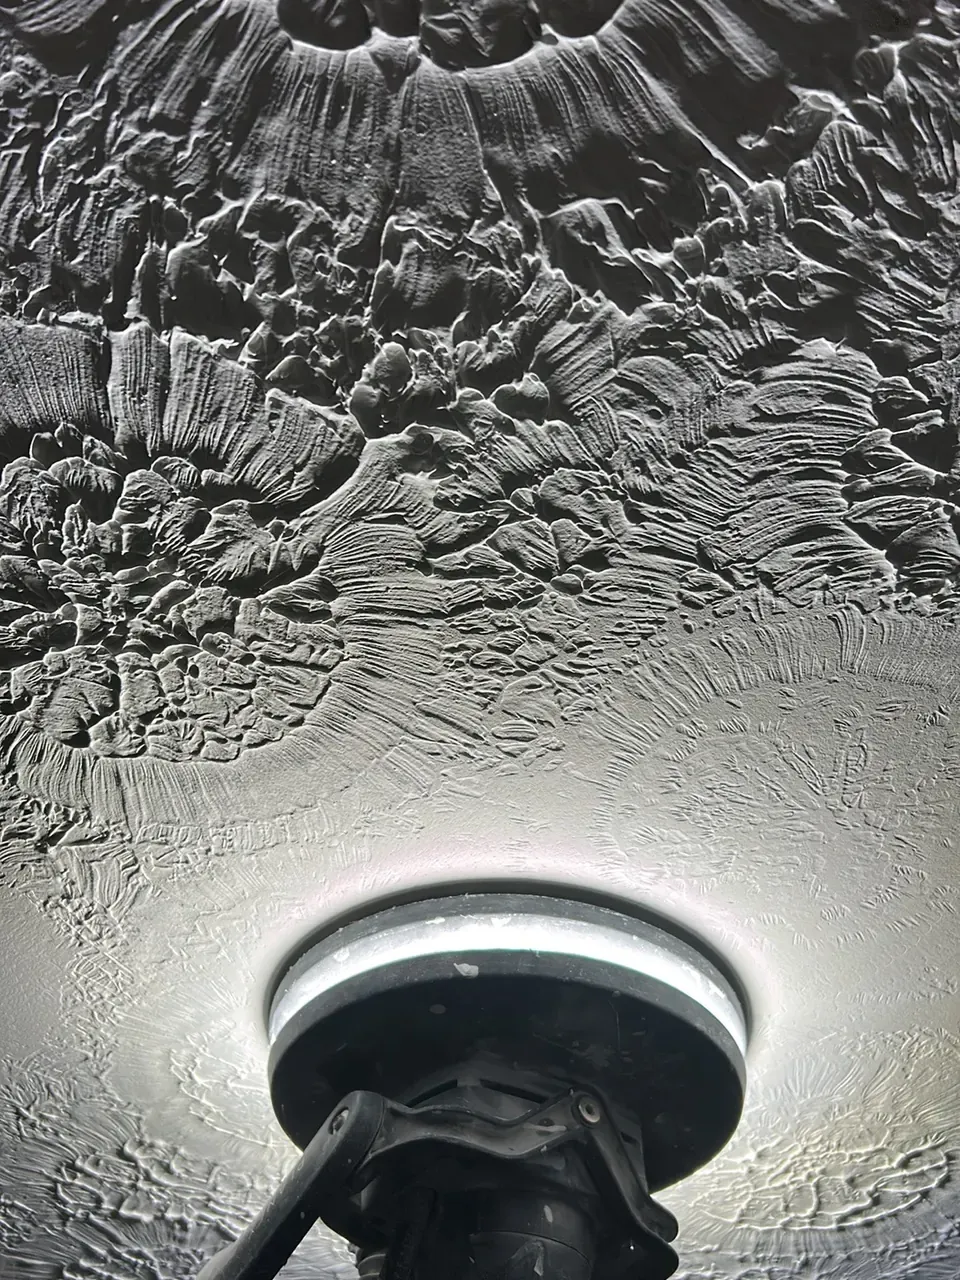
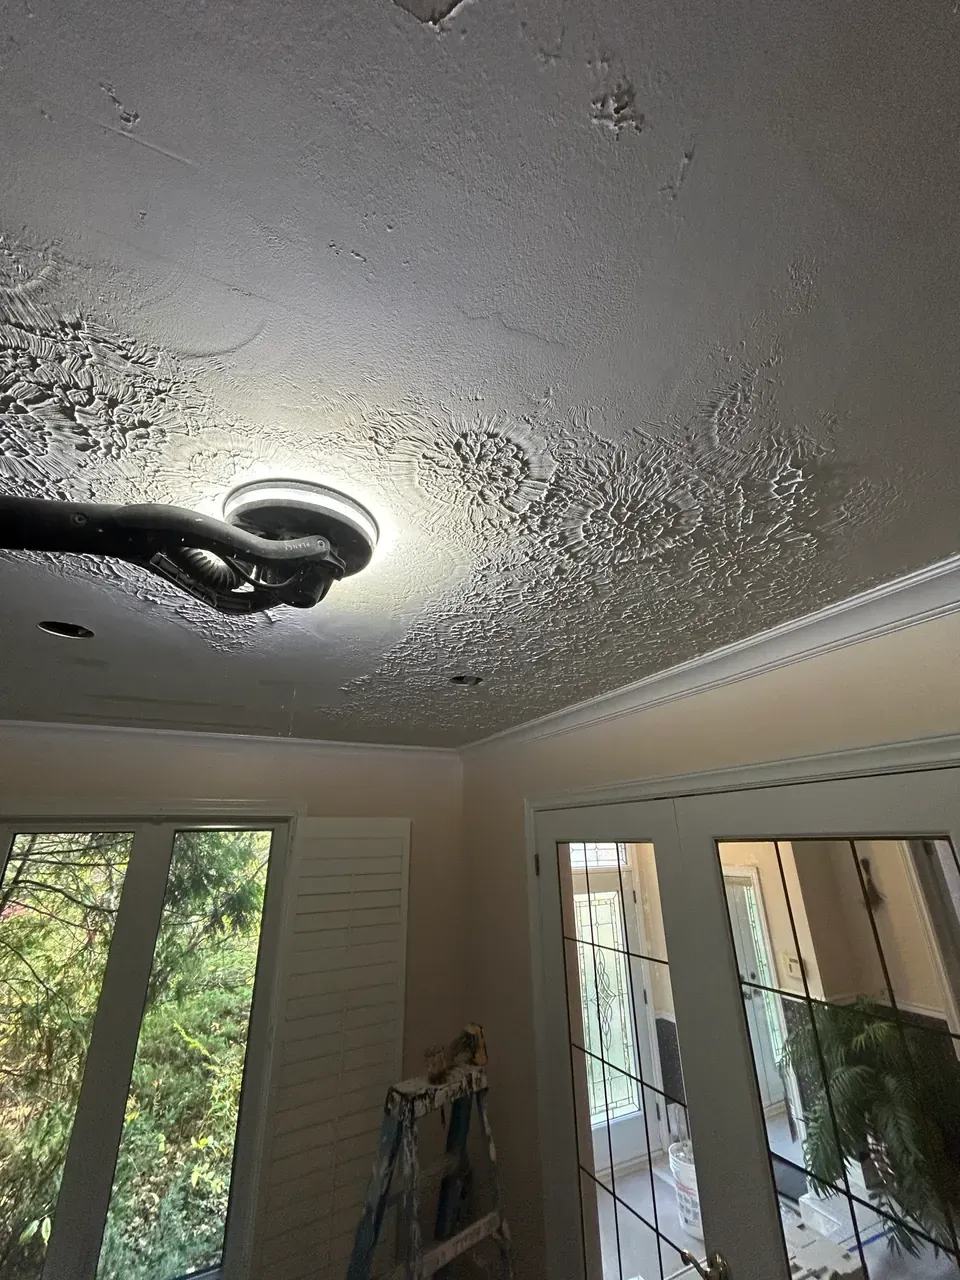
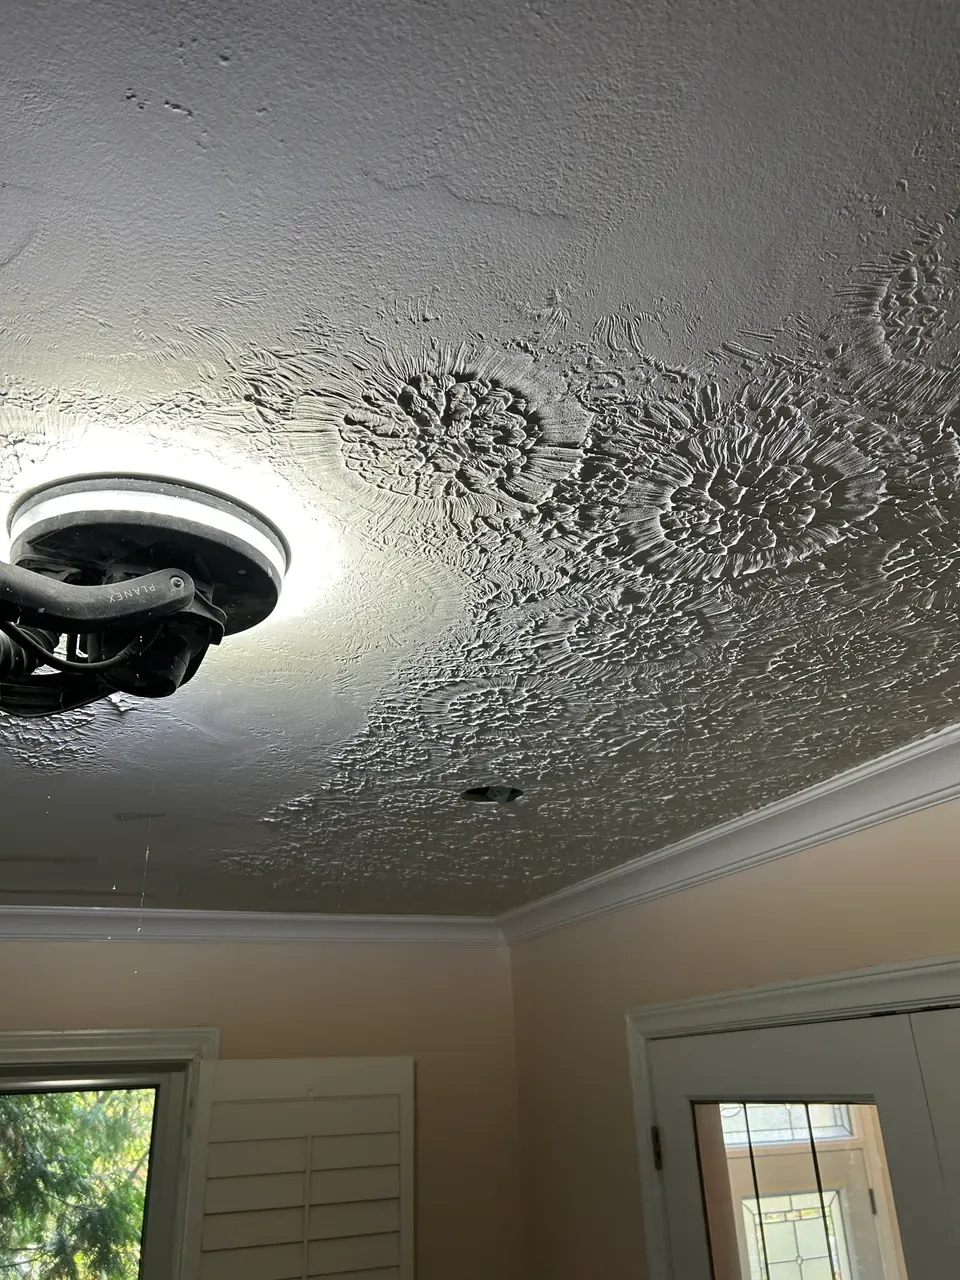
The original ceiling had a pronounced repeating floral and swirl pattern. Close-up photographs show the height of the texture and the shadows between its ridges. Wider views show that pattern across the room, alongside crown moulding, recessed-light openings and a large window with shutters.
The work in this Dundas home was to remove the heavy texture, replaster the ceiling and finish it smooth. This is a useful example for homeowners comparing a similar ceiling with ordinary popcorn texture: the starting surface matters when discussing the scope of a ceiling renovation. A photograph of the whole room and a close-up of the pattern help us understand what needs to be assessed.
Explore our texture removal and smooth ceiling services or see ceiling removal in Dundas for local planning.
Protection and texture removal
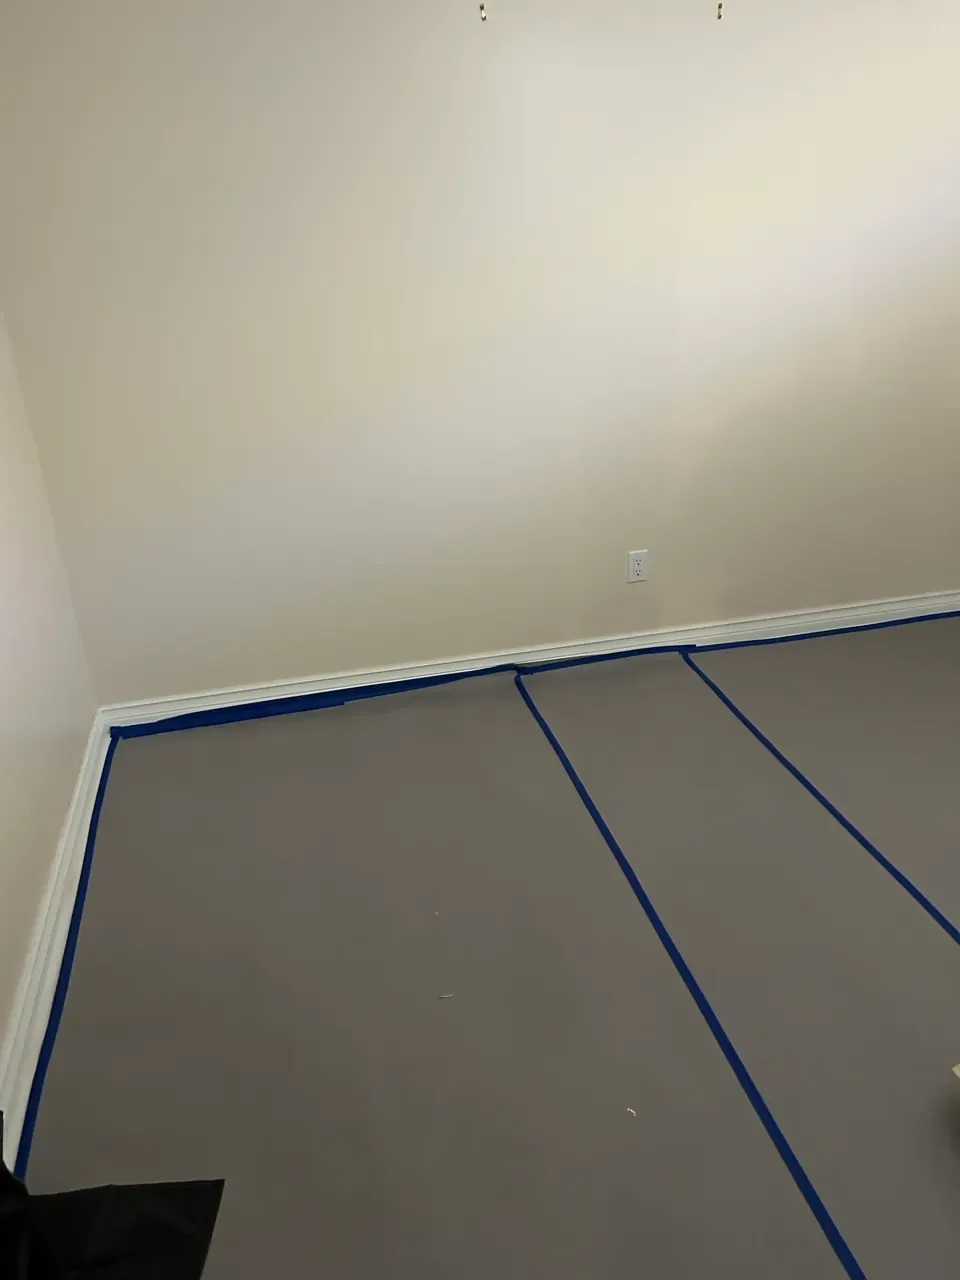
The project photographs show floor protection with taped seams and protection along the baseboards. They also show a ceiling sander working across the patterned surface, with a hose connected to the equipment. These details help explain the preparation and removal stages visible in the room.
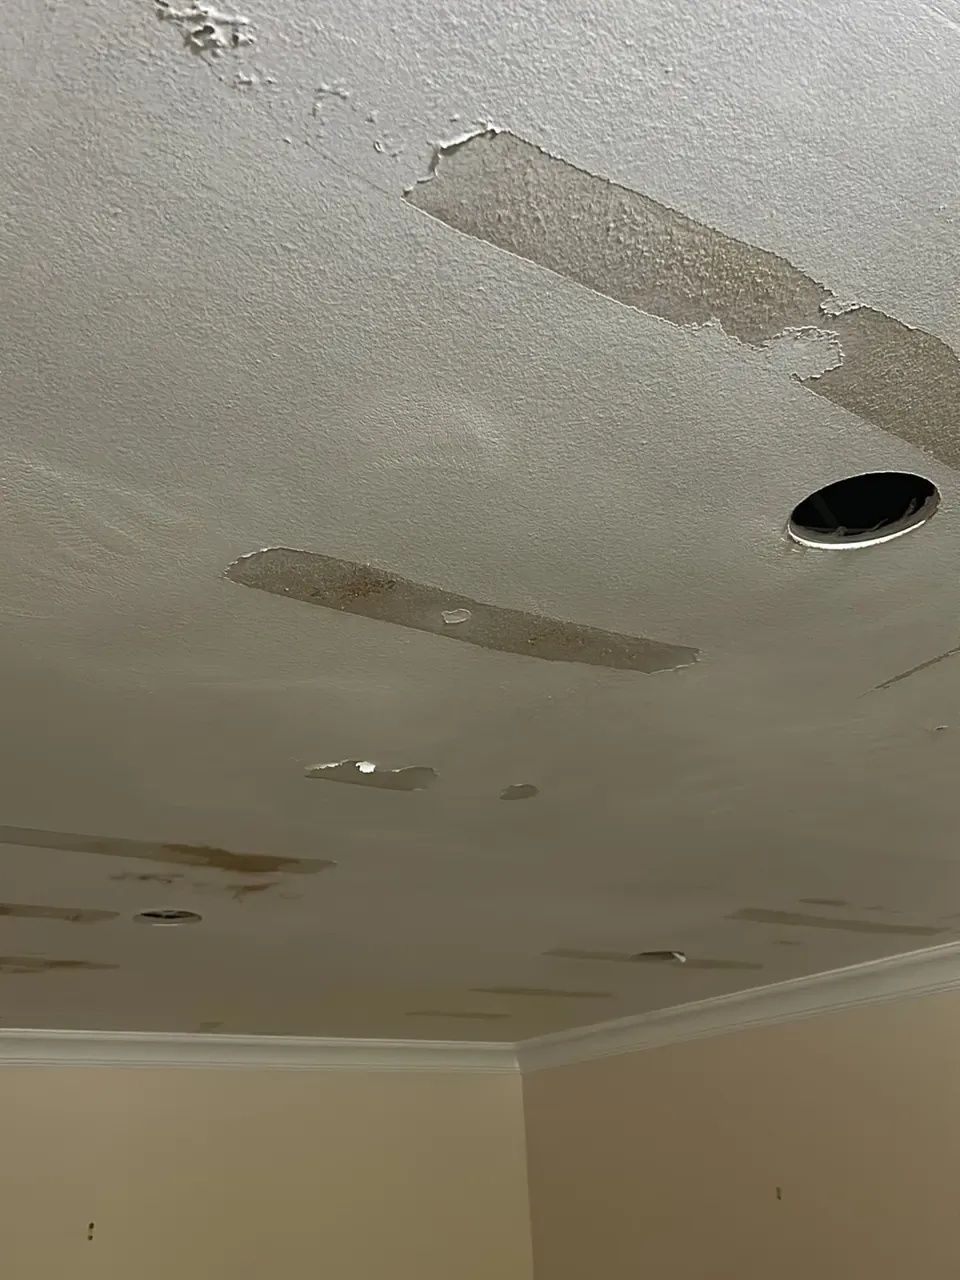
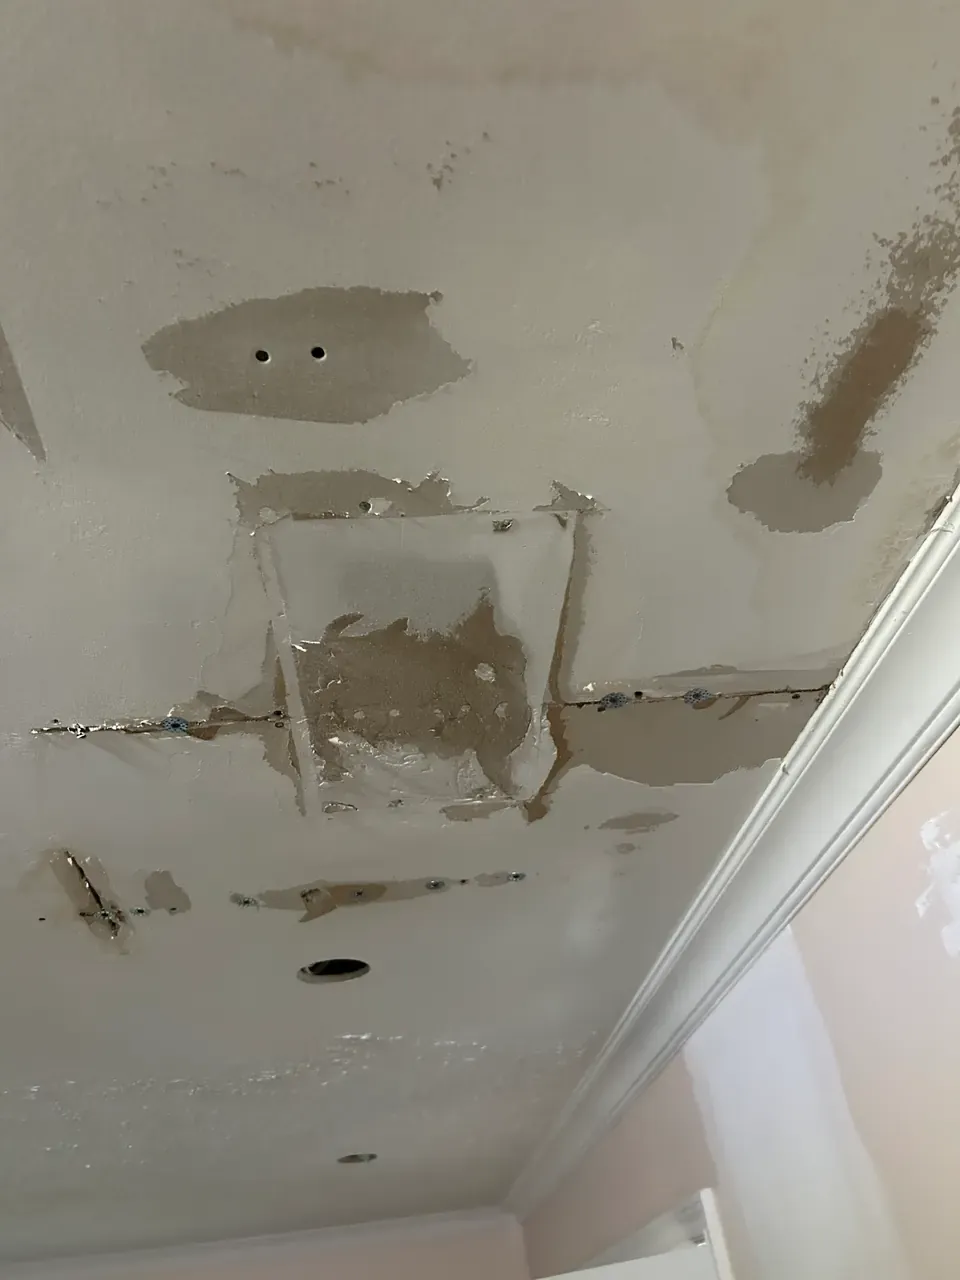
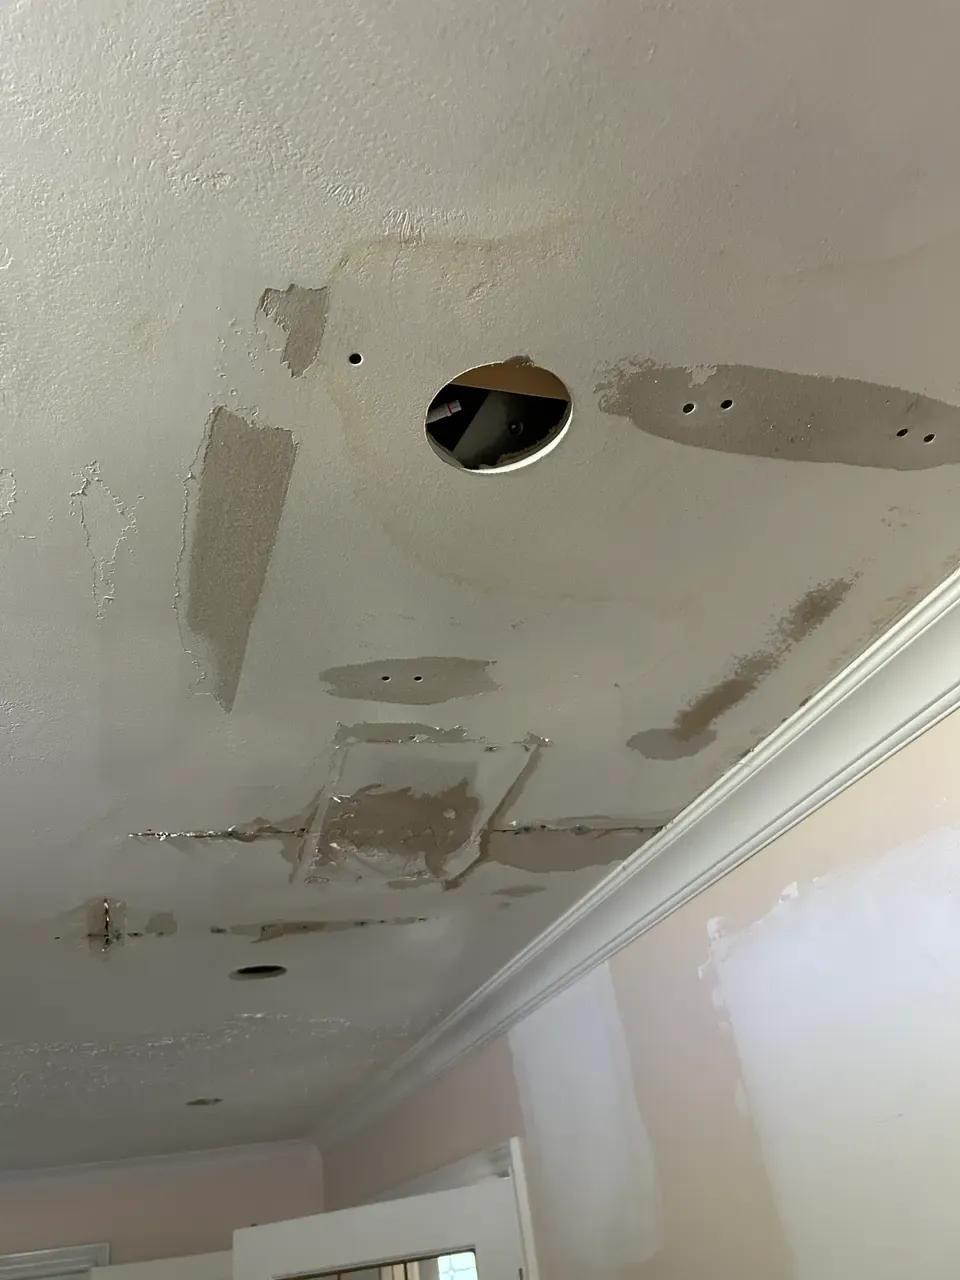
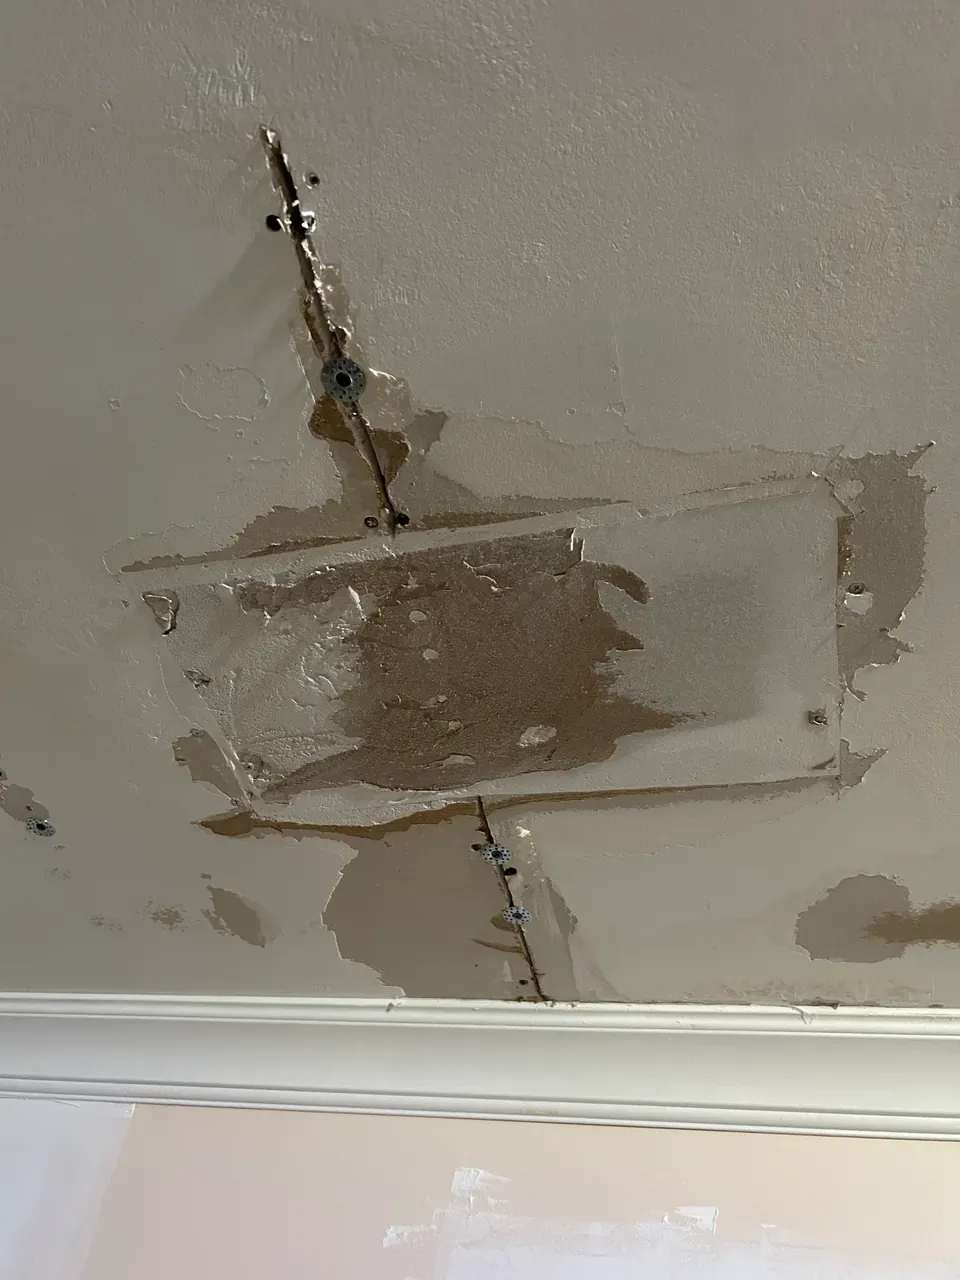
As the texture came away, the surface beneath it became visible. Some photographs show exposed patches and transitions around recessed-light openings. Removal was therefore one stage of the job; the ceiling still needed replastering and finishing before it reached the smooth result shown in the final images.
Surface preparation, replastering and finishing
The preparation photos show a rectangular patch area, exposed joints and visible fasteners with washers. They document the condition during the work, rather than a finished ceiling. The photographs do not establish the cause of those earlier surface conditions, so we do not attribute them to a leak or a structural problem.
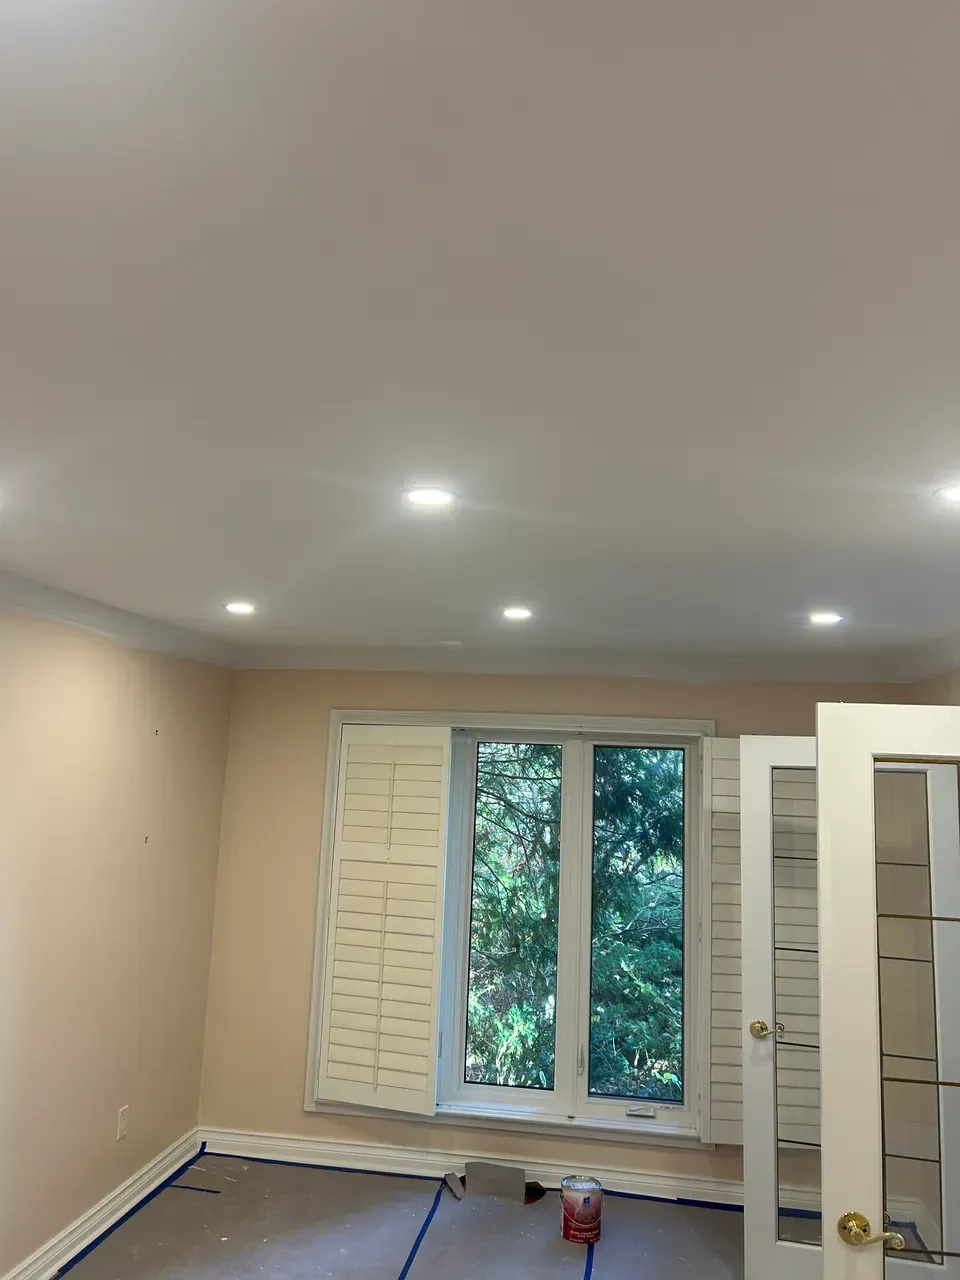
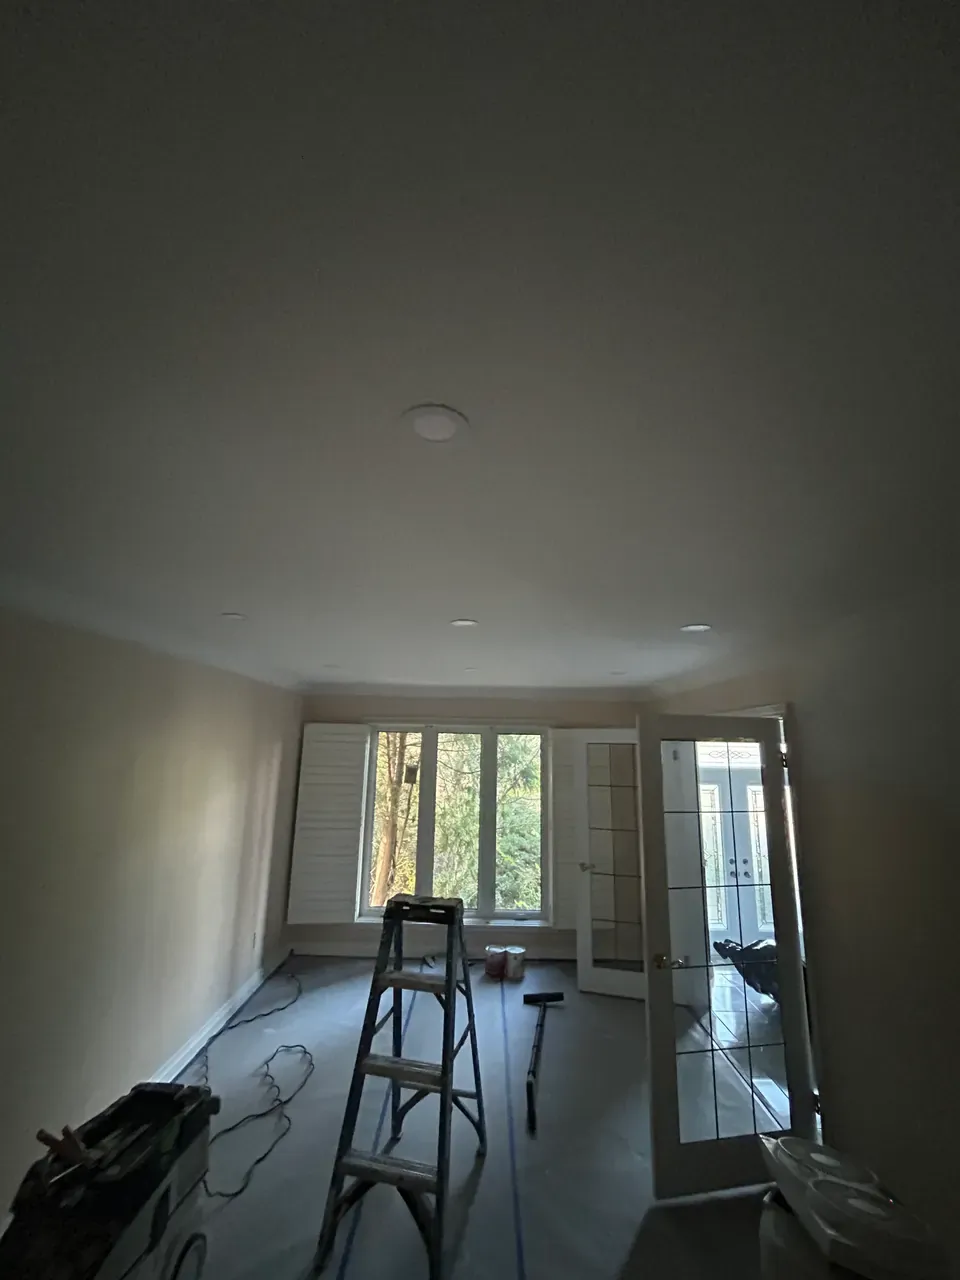
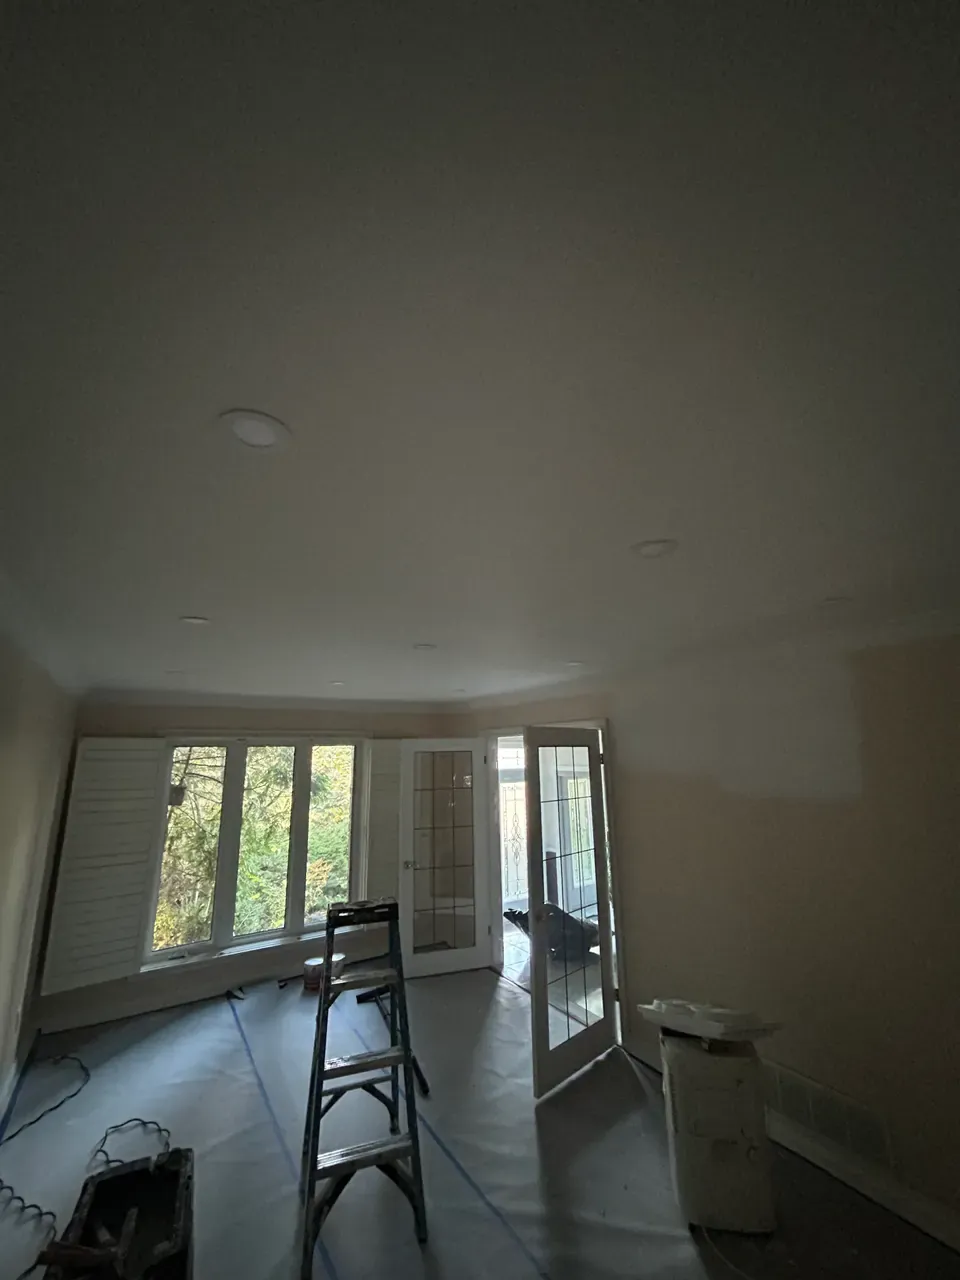
Following heavy texture removal, we replastered and finished the ceiling. The final views show a continuous smooth surface around the recessed lights and along the crown moulding. Keeping the before, preparation and finished photographs together makes the extent of the transformation easier to understand than an isolated after image.
The window, shutters, glazed doors and crown moulding provide consistent reference points across the wider photographs. Lighting and camera angles differ between stages, so the images are presented as a documented sequence rather than an exact matched-angle comparison.
Our guide to skim coating after ceiling removal explains why the finishing stage matters.
The finished result
The raised pattern is no longer visible in the finished ceiling views. The broad surface reads as smooth, with the recessed lights and the existing room details visible around it. Floor protection and tools remain in some of these photographs: they show the completed ceiling while the room was still set up for work.
For homeowners considering a similar change, the main lesson is to discuss the whole finish scope. Removing a decorative pattern and delivering a smooth ceiling are separate parts of the work. The estimate should make clear what happens after removal and what finished endpoint is included.
A Dundas project for nearby homeowners to compare
This job was completed in Dundas, within Hamilton. Homeowners in Dundas and the wider Hamilton community can use the photographs to compare the texture, trim details and ceiling condition in their own rooms.
We also serve Burlington homeowners considering heavy texture removal and smooth ceiling refinishing. This is a nearby Dundas example, not a Burlington job. Share your own room photographs when asking for an estimate: a similar appearance does not establish the same substrate condition, repair requirements or scope.
Have a heavily textured ceiling?
Send a wide room photo, a texture close-up, your city and the finish you want. For Dundas, Hamilton or Burlington, we can discuss the removal, repair and finishing scope for your home.
Request a ceiling quote →