
Why Garage Drywall Tape Repairs Fail Again (2026)
Updated September 11, 2026
A repair that reopens needs a review of the previous method and unresolved conditions. Document the pattern before covering it again, then define what the next repair will address.
- Trusted since 2005
- Fully insured
- Dust-controlled sanding
- Paint-ready finishing
- 3-year workmanship warranty
Quick Answer
A repair that reopens needs a review of the previous method and unresolved conditions. Document the pattern before covering it again, then define what the next repair will address.
A garage drywall tape repair that keeps failing needs a review of the earlier work and any condition that remains unresolved. Repeating the same surface treatment may leave the same weak base beneath it. Document where the defect returned, when it appeared and what the previous repair included before choosing another coat of compound or paint.
EPF's garage drywall repair and re-taping service can assess visible failed joints and discuss the next appropriate scope. This guide helps organize the history, compare repair proposals and identify where further investigation may be needed. It does not diagnose concealed movement or promise that every recurring crack has one simple cause.
Start with the condition you can see
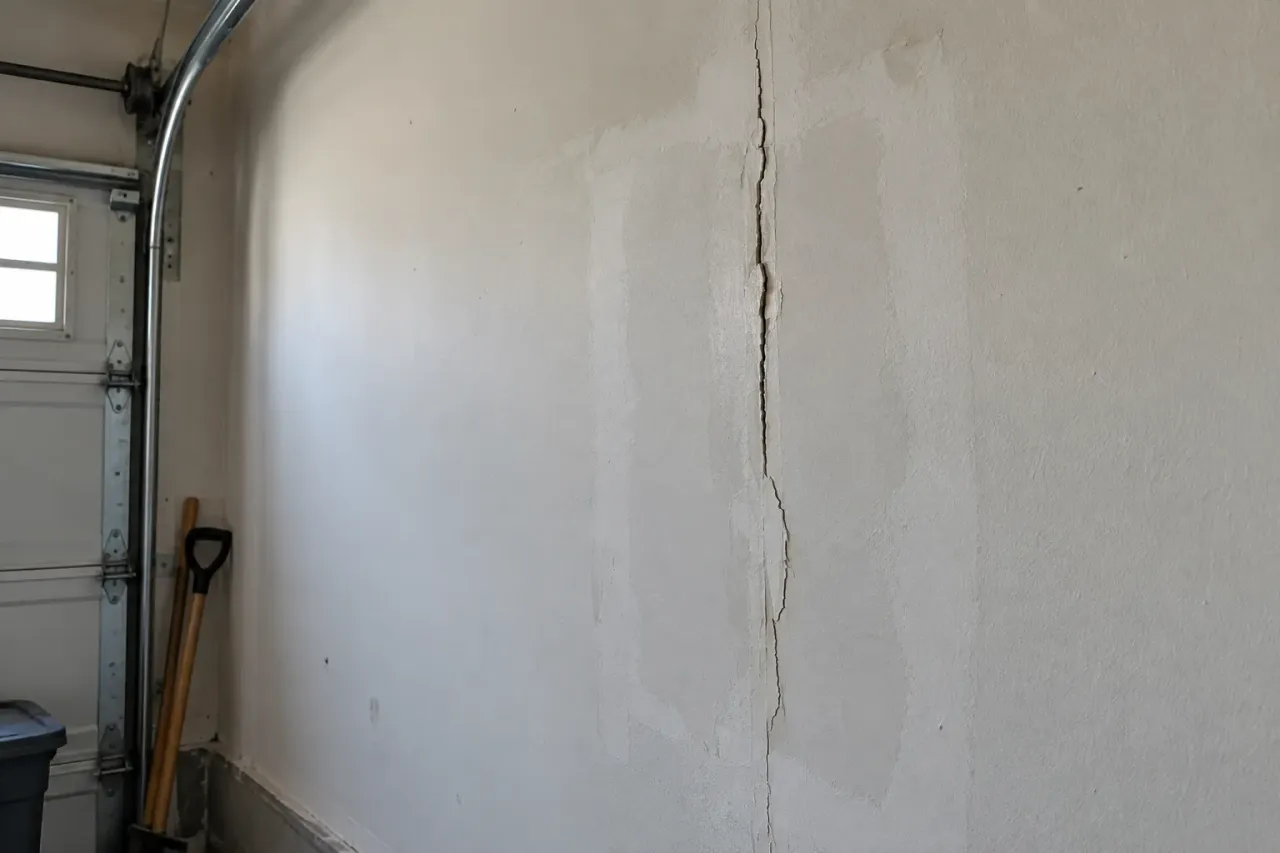
Use these observations to prepare the assessment, not to diagnose concealed construction. Pair each detail photograph with a wider view so the repair area, adjoining surfaces and access are clear.
Same seam reopened
Compare timing and location with the previous repair.
Failure beside a patch
Assess the retained edges and surrounding joint.
Cause unresolved
Coordinate investigation before cosmetic work.
Define what failed the second time
A line reopening through the centre of a patch is different from tape lifting beside its edge. Flaking paint, a raised ridge and a new impact mark are also different observations. Describe the actual change rather than saying only that the whole repair is bad again. That gives the next assessment a clearer starting point.
Take one broad photograph showing the wall or ceiling and another showing the returned defect. If the outline of the earlier patch remains visible, include it. The relationship between the old work and the new failure can help frame questions about retained material, repair boundaries and surface preparation.
Do not pull or sand the area just to make the failure more obvious. That can remove evidence and change the amount of work needed. If there is visibly loose or sagging board, keep clear of the suspect area and arrange suitable assessment before treating the problem as ordinary finishing.
Build a short repair history
Record approximately when the original defect appeared, when it was repaired and how long the result looked acceptable. Include what you know about the method without guessing. A receipt, written scope or progress photo can be more useful than a memory that several coats were applied.
Note whether the repair included removing tape, correcting board, applying primer or repainting a larger area. Those are distinct stages. If you do not know what happened beneath the final coat, say so. The assessor can work with an unknown history more reliably than a confident but inaccurate material description.
Keep any relevant moisture event or later trade work in the timeline. A new opening, shelf installation or impact after completion may change the discussion. The purpose is to identify useful context, not assign blame. A factual record helps separate an unresolved original condition from damage that occurred afterward.
A larger patch is not automatically a different repair
A repeat attempt may cover more area while still relying on the same unsuitable layer. Broadening the surface coat does not itself address a failed bond or loose base. Ask what the new proposal will correct beneath the visible finish and why that change is appropriate for the observed condition.
Equally, a repair should not be forced into an extremely narrow boundary simply to minimize repainting. The affected joint needs to connect to suitable retained material and allow a proper transition. The appropriate size follows the condition, not a promise that only the visible line will be touched.
The homeowner should be able to understand the difference between the old and proposed scope. A useful explanation might identify failed reinforcement, unsuitable retained compound or board needing assessment. A claim that this time there will be more coats is not enough to explain what will change.
The original cause may still need attention
Possible contributors to repeated failure include board condition, moisture, movement, preparation or unsuitable material remaining near the repair. More than one factor may be involved. The location and timing of a crack can guide questions, but they do not prove a cause without assessment.
If the garage has ongoing dampness or an unresolved leak, address the source and assess affected materials before cosmetic work. If the surface changes shape or supporting construction is uncertain, obtain the appropriate professional review. A finishing contractor should not be expected to certify concealed conditions from a photograph.
Keep investigation separate from the appearance upgrade. The next step may be to establish whether the base is suitable before agreeing on a skim or paint package. That is a practical sequence, not a reason to abandon the project. Ask what information is needed and how the scope will follow the findings.
Loose board changes the joint discussion
Tape and compound finish a joint; they do not make an unreliable panel dependable by themselves. Where attachment or board integrity is compromised, appropriate correction may be needed before new reinforcement. The assessment should identify the relevant construction and repair boundary.
Do not add fasteners randomly along the recurring line. Support and concealed services need to be understood, and an attached-garage assembly may have requirements beyond cosmetic finish. A generic online fastening pattern is not a substitute for evaluating the actual wall or ceiling.
The re-tape or replace garage drywall guide explains how board work differs from joint rebuilding. Use it when the new proposal includes replacement and you want to understand why retaining the existing panel may or may not be appropriate.
Failed material can extend beyond the visible edge
A repair may appear to have a sound perimeter while unsuitable material continues nearby. The contractor should assess the surrounding joint rather than assume the old patch boundary is the correct new one. Retained work and new preparation need to be considered together.
That does not mean all tape must be removed from every garage surface. Sound work can remain where appropriate. Ask the assessor to identify what is known, what is uncertain and how the proposed boundary reaches suitable material. The explanation should be based on condition rather than a blanket preference for stripping or covering.
If the area expands after work begins, agree how the finding will be communicated before additional work proceeds. Photos and a revised description help keep the scope reviewable. An open-ended instruction to keep removing until it looks right gives the homeowner less control than a defined process for reviewing new evidence.
Previous compound and paint affect the new base
Older repairs may include several layers of compound and coating with different adhesion or surface profiles. The next finisher needs to assess what can remain and what preparation is required. The fact that a product once dried hard does not establish that it is a suitable base for the new work.
Keep labels or product details if available. If leftover supplies are offered for reuse, have the contractor review their condition and suitability. A familiar brand or an unopened bucket does not automatically resolve compatibility with the existing joint and coating.
Avoid aggressive preparation before the assessment, particularly where old materials are unknown. Appropriate advice may be needed before disturbance. The useful homeowner contribution is a clear record of the condition and history, not an improvised removal that obscures what the contractor needs to understand.
Surface shape can hide a separate problem
Repeated repairs can leave a pronounced hump even if the latest failure is a narrow line. The next scope may need to address both the joint condition and the accumulated surface profile. Applying another narrow band can make the appearance worse under side light without changing the underlying issue.
A sound raised area may need reshaping or broader blending, while a detached layer needs a different correction. Those operations should not be mixed together under a vague instruction to sand everything smooth. Excessive sanding can expose reinforcement or damage board paper beside the old repair.
Ask how the new finish will meet the retained wall and how the final appearance will be reviewed. A repair can require a wider compound transition and a larger painting boundary than the original defect. Naming those areas makes the result easier to assess before accepting a total.
Distinguish seasonal observations from a diagnosis
A homeowner may notice that the line is more visible at certain times of year. Record that pattern, but do not assume it establishes the cause. The garage's use, environmental conditions and existing construction all need context. A crack alone is not a complete explanation of how the building is behaving.
Use dated photographs from similar viewpoints if available. Note changes in moisture, heating or use without trying to force them into a single explanation. The information can support an assessment while leaving room for other contributing factors.
The garage seam cracking guide explains how to describe location and appearance. Keep structural or material conclusions with the appropriate professional. A finisher can discuss a repair scope without promising that a seasonal pattern has been permanently eliminated beneath the new coating.
Ask what makes the proposed method suitable
A useful repair explanation identifies the assessed failure and the preparation that addresses it. It should describe necessary board correction, removal of unsuitable material, joint rebuilding and the finishing transition as relevant. The homeowner does not need to prescribe every tool or product to understand that sequence.
Ask which manufacturer instructions and existing construction details govern the selected materials. Avoid choosing by claims of the strongest tape alone. A compatible system applied to a suitable base matters more than an isolated product label that says little about the rest of the repair.
If the contractor cannot confirm the base from photos, arrange the assessment needed before treating a preliminary description as a final method. Uncertainty should be visible in the scope. It is better to identify a missing condition than to make a confident promise that the same crack can never return.
Plan enough time for the revised work
A repair involving old material removal or thick corrections may not follow the same sequence as new, clean board. The contractor should account for preparation and product readiness at each stage. A small visible area does not guarantee a short elapsed schedule.
Garage temperature, humidity and access can affect the work window. Setting time and drying time are different, and the next operation should follow the selected products' instructions. Do not assume that a faster-setting material removes every waiting interval before sanding or painting.
Coordinate the painter after the finishing sequence is defined. If further findings change the repair, communicate the effect before another trade arrives. A revised schedule based on the actual surface is more useful than preserving an original date by covering material before it is ready.
Keep a record during the new repair
Retain the written scope, photos of the original condition and any agreed changes. Where appropriate, ask for progress information before the repaired area is fully concealed. The record should identify what was addressed rather than imply that every hidden part of the garage has been inspected.
If another trade creates new damage, photograph it and discuss the repair separately. A later cut-out or impact should not be confused with the original returning seam. Keeping events distinct helps the homeowner and contractor focus on the work now required.
Avoid turning the record into an argument about earlier workmanship. Its purpose is practical: show the starting condition, agreed remedy and final handoff. A concise set of labelled photos and notes is easier to use than a large unsorted folder with no dates or locations.
Define the finish and inspection after correction
Once the base and joint are suitable, decide how much wider appearance work is included. The homeowner may want only the failed area repaired or may choose to improve an entire wall marked by several old attempts. Those are different scopes and should be priced as such.
Share the intended paint and lighting before the last finishing stage. A more demanding coating can reveal surface transitions that were less noticeable previously. A representative sample may help where expectations are high, but it does not replace necessary correction of the joint beneath it.
Before primer, inspect obvious ridges, exposed tape and damaged paper. Agree who handles smaller defects revealed after priming and who spot-primes corrections. The final review should use the agreed room conditions rather than an undefined guarantee that every surface will remain flawless under any light.
Compare the new quote with the actual problem
Provide each contractor the same history, photographs and desired handoff. Compare preparation, retained material, board work, re-taping, finishing and decoration. If one proposal includes investigation and another assumes the cause is already resolved, they are not equivalent quotes.
Confirm protection, cleanup and access needs as well. EPF uses dust-controlled sanding with HEPA support where appropriate, but preparation and removal still require a planned work area. Stored items and vehicles should not be assumed to remain in place simply because the visible defect is small.
A useful estimate explains what the next repair changes and what remains outside its scope. If the underlying issue needs another professional, identify that dependency before accepting a cosmetic finishing date. The homeowner should be choosing a defined remedy rather than paying for the same vague promise again.
Arrange the next assessment
Send your city, broad garage views, close-ups of the recurring defect, approximate heights and the earlier repair timeline. Include any written scope, product details or progress photos you have. Mention moisture, changes in the surface and access restrictions without trying to diagnose them yourself.
Use the quote form to describe the history and share a photo link if available. EPF can discuss the assessment needed and distinguish local joint work from board correction, further investigation or a broader finish upgrade.
The next repair should have a clear reason for being different: a suitable base, an appropriate boundary and preparation that addresses the assessed failure. That is a more useful direction than automatically adding another layer over a seam that has already shown it needs a closer look.
Planning this repair in Hamilton
State the community and postal code in your Hamilton enquiry so the property location is clear. For a seam that has cracked again, add previous repair dates if known and photographs showing the full joint. The repair assessment depends on the board, joint and moisture conditions at the property, not its neighbourhood.
EPF serves all Hamilton neighbourhoods. Review Hamilton garage repair coverage and neighbourhoods, then include your location with the repair details when requesting an estimate.
FAQ
Why did the same garage patch fail again?
Possible causes include retained failed material, board condition, moisture, movement or preparation. The pattern needs assessment rather than a single assumed explanation.
Does a wider patch solve recurring failure?
Only if the method addresses the assessed problem. A larger surface coat can still rely on the same unsuitable base.
What should I keep from the previous repair?
Keep photos, dates, the written scope and product information if available. Identify the location of the returned defect relative to the old patch.
Can a finisher guarantee that concealed movement has stopped?
No. Uncertain supporting conditions need the appropriate assessment. The cosmetic repair should follow a suitable base and a defined scope.
Field Photos
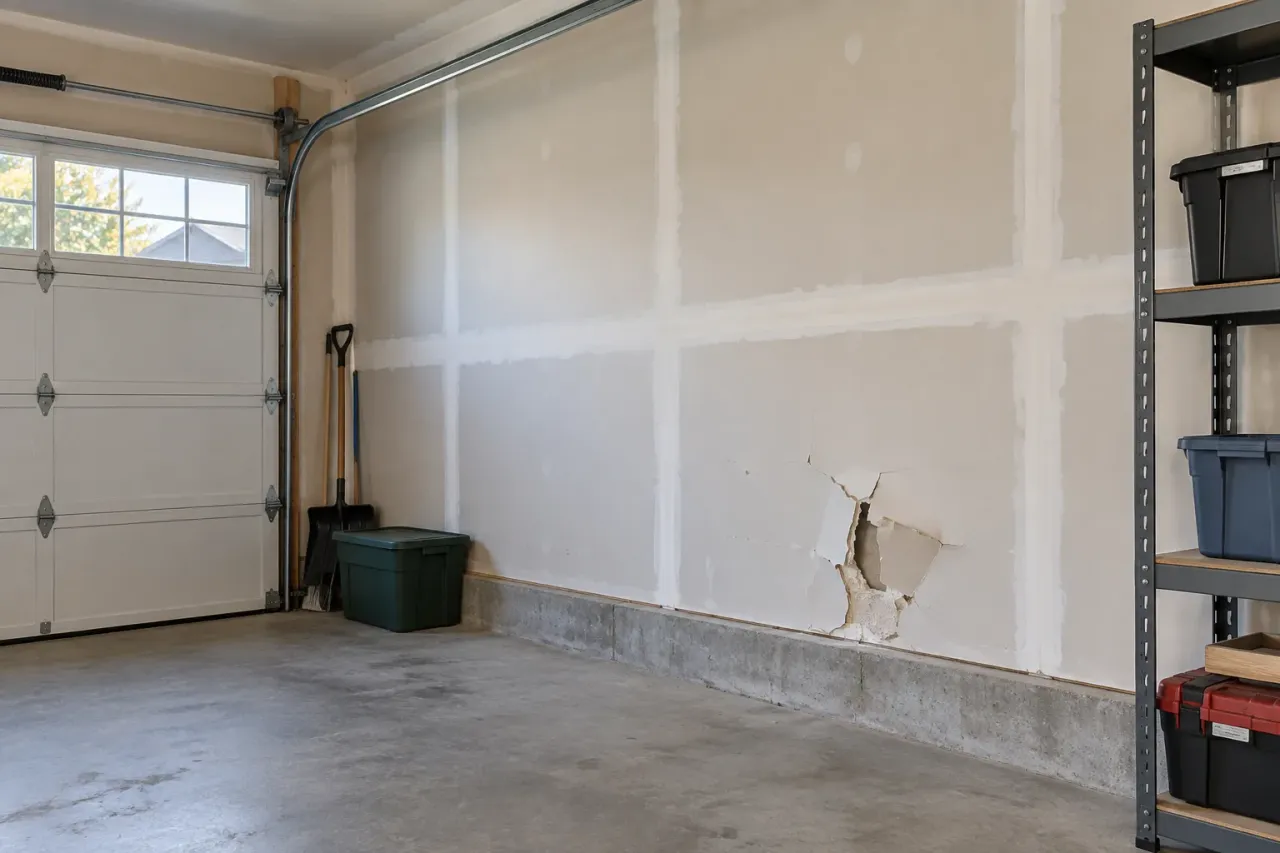
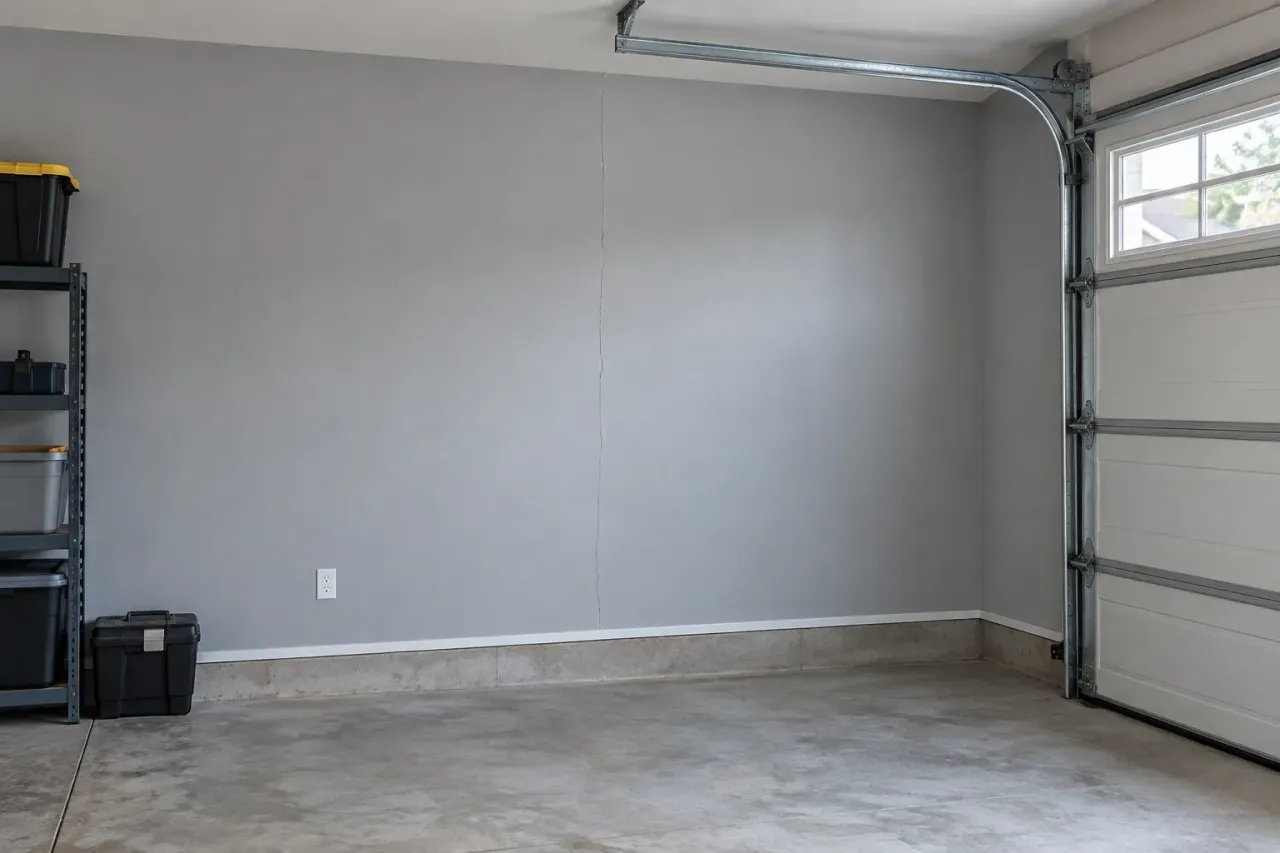
What the Work Can Look Like
Article Review
AuthorEPF Pro Services
Reviewed byEPF Pro Services
UpdatedSeptember 11, 2026
Plan your drywall scope
Get a drywall quote today
Share photos, room sizes, and timing. We reply the same day with GTA drywall availability and a clearer written scope.
Quick next step