
Why Garage Drywall Seams Crack (2026 Repair Guide)
Updated September 11, 2026
A line at a seam is an observation, not a diagnosis. Record its location and history so surface cracking, failed tape and underlying movement can be assessed separately.
- Trusted since 2005
- Fully insured
- Dust-controlled sanding
- Paint-ready finishing
- 3-year workmanship warranty
Quick Answer
A line at a seam is an observation, not a diagnosis. Record its location and history so surface cracking, failed tape and underlying movement can be assessed separately.
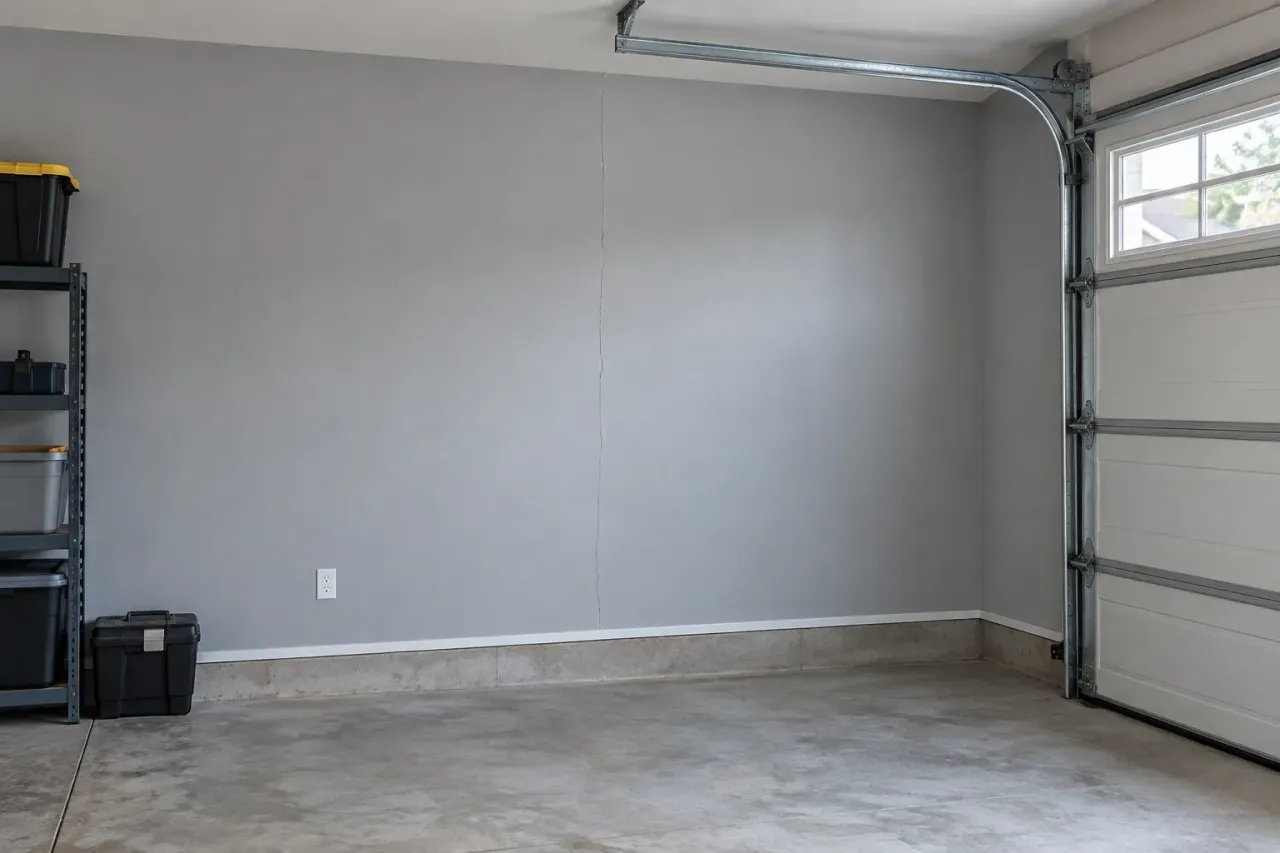
Garage drywall seams can crack because the joint, the board or the conditions around them are not performing as intended. A line in the finish does not identify which part has failed. Before filling it, record its location, appearance and history so the repair can address the affected area rather than simply hide the line for another coat of paint.
The garage drywall repair service includes assessment of cracked seams and suitable re-taping or board corrections. This guide explains how to describe a crack, when a local finish repair may be considered, and what to ask if the defect has appeared more than once. It does not diagnose structural movement from a photograph.
Start with the condition you can see
Use these observations to prepare the assessment, not to diagnose concealed construction. Pair each detail photograph with a wider view so the repair area, adjoining surfaces and access are clear.
First visible line
Record its location and photograph the whole wall.
Repeated opening
Review the earlier repair and possible unresolved cause.
Changing wall shape
Seek appropriate assessment before finishing.
Start with the location of the line
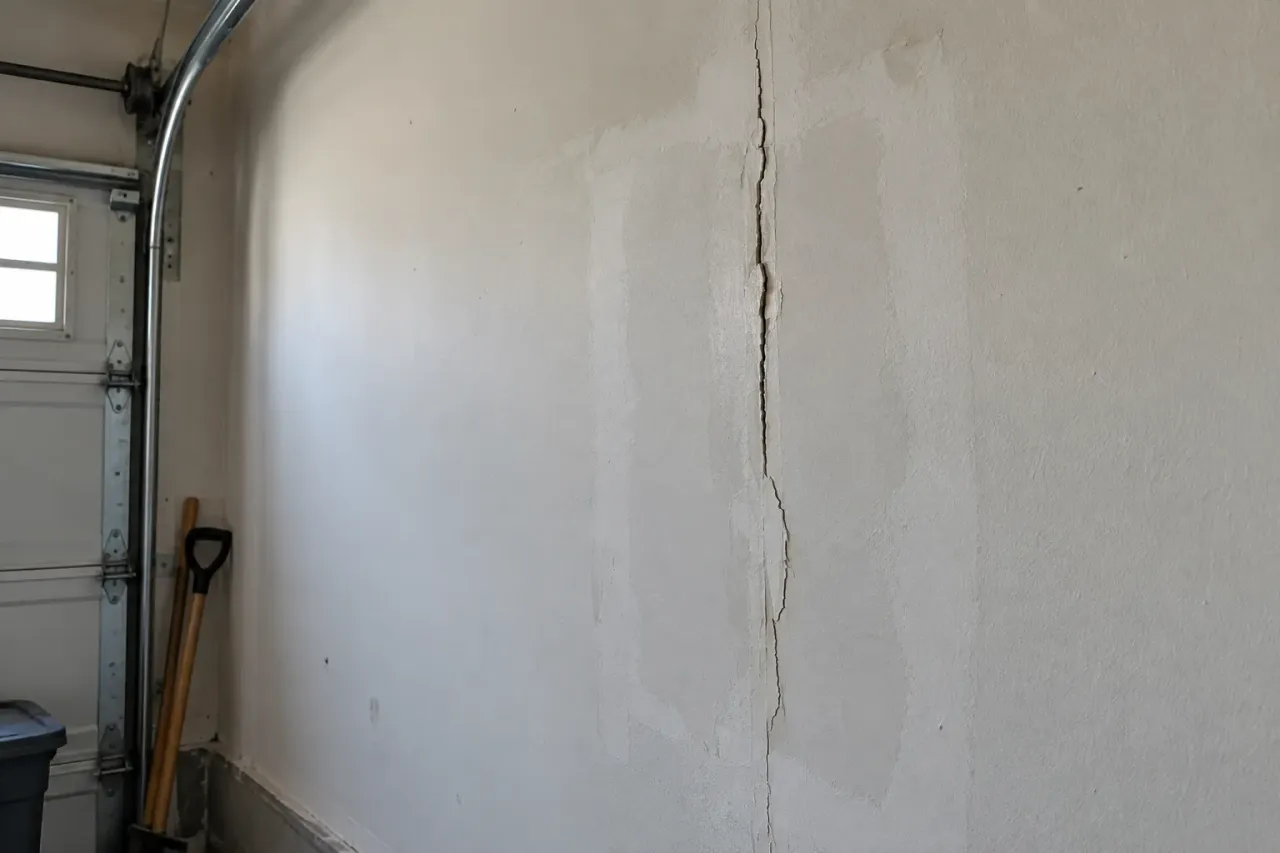
A crack following a straight board joint raises different questions from a scratch caused by an object brushing the wall. A line at an inside corner, beside an opening or through the edge of an older patch also deserves its own description. Identifying the location is useful even if you do not know the technical name of the detail.
Take a photograph that includes the full wall or ceiling plane, then a closer view of the line. Show where it starts and ends. A close-up alone can make an isolated finish defect look like a much larger construction issue, or hide the fact that several connected seams are affected. Scale and context help the estimator understand what needs to be reviewed.
Do not draw conclusions from the direction alone. A vertical line is not automatically harmless, and a diagonal line is not a complete diagnosis. Record what you can see and arrange the appropriate assessment where the condition is changing, associated with loose material or otherwise uncertain. The repair method should follow findings, not a rule based on the photograph's geometry.
Is the reinforcement failed or the surface marked?
A thin surface line can occur over an otherwise intact joint. In another area, the tape itself may be split, detached or poorly supported by the material beneath it. Those are different conditions. Filling the visible line may be appropriate for a limited surface correction, but it does not rebuild reinforcement that has actually failed.
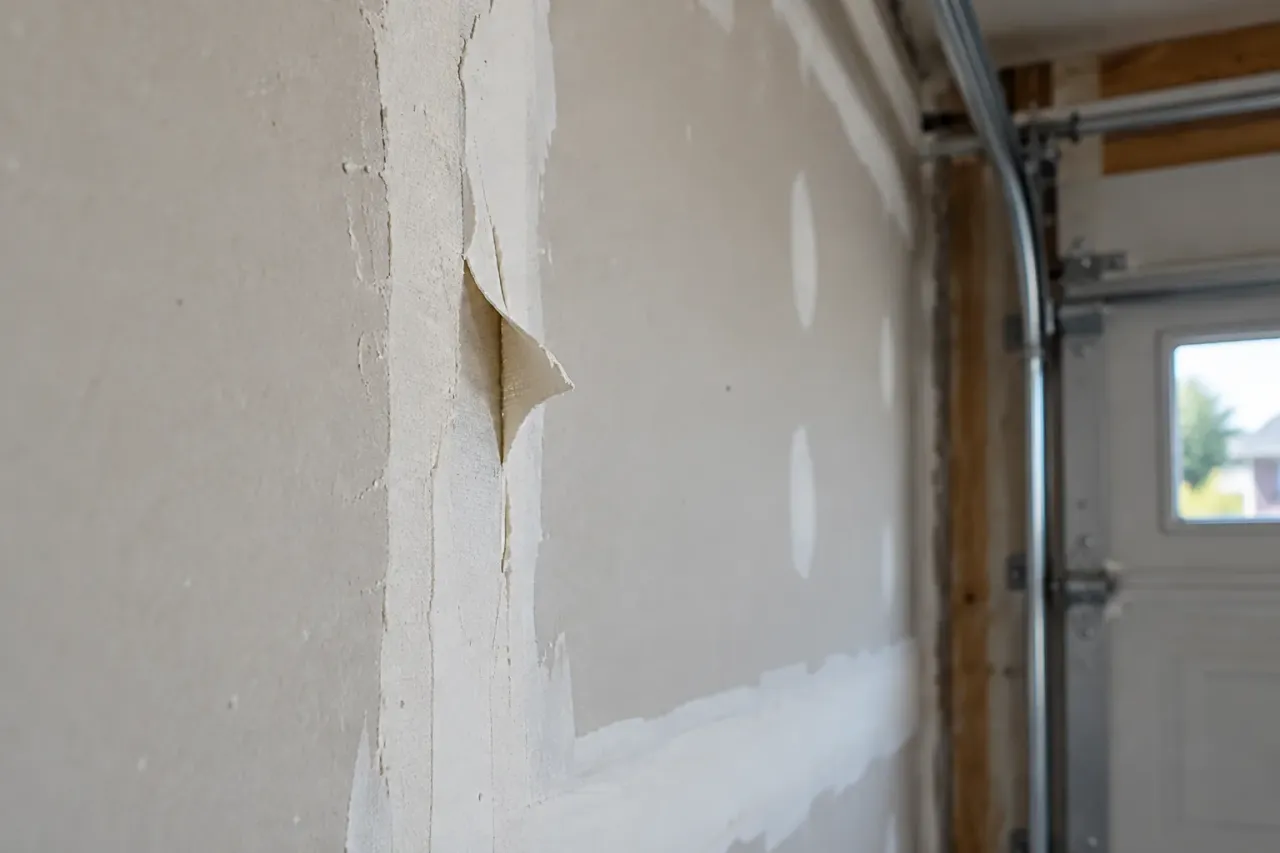
Look for accompanying observations without disturbing the material: a curled edge, a broad raised patch, flaking paint or visible panel misalignment. Tell the contractor about them. Do not push or pull on uncertain board simply to test whether it moves. Assessment should establish the repair base before a homeowner creates a larger opening.
The guide to peeling garage drywall tape covers visible detachment in more detail. A crack and a loose strip can appear on the same seam, but they should not be treated as interchangeable labels. The scope needs to account for the actual condition along the affected joint and its transitions.
Record the timing without guessing the cause
Write down when you first noticed the crack and whether it has changed. Useful history includes an earlier repair, a moisture event, new storage installation or another trade opening the wall. If the line becomes more or less noticeable at different times, record that observation rather than immediately assigning it to seasonal movement.
A garage may experience different conditions from a continuously conditioned room, but that does not prove temperature or humidity caused a particular defect. Existing joint preparation, board attachment, damage and other factors may also be involved. Several plausible explanations can exist until the relevant area is assessed.
Keep photos with dates and similar viewpoints. Consistent images can help show whether you are discussing the same line or a different nearby defect. Avoid relying only on memory of how wide it looked last winter. You do not need specialized monitoring equipment to provide a useful history, and a record is not a substitute for professional evaluation where the situation warrants it.
Why another layer of filler may not be enough
A surface fill changes the visible face. If the underlying joint remains loose or its reinforcement is unsuitable, the new material still depends on that base. A recurring line may reopen through the added layer or appear at its edge. The repair discussion should ask what is being corrected beneath the new finish.
That does not mean every crack needs all surrounding tape removed. Sound material may be retained when appropriate. A finisher should assess the affected area and explain a practical boundary. Unnecessary stripping creates more joints and decorating work, while too narrow a repair can leave unsuitable material immediately beside the new finish.
Ask whether the proposal is a cosmetic correction, local joint rebuilding or board work followed by re-taping. Those are useful categories for comparing quotes. A description such as three coats over the crack does not explain which condition is being addressed or why the finished area should be a suitable base for paint.
Inside corners and wall-to-ceiling transitions
A line where two planes meet can involve the corner treatment as well as the adjoining surfaces. Photograph both sides and the full length that is affected. A quote for a flat wall seam may not include the connected ceiling corner unless it is identified. The homeowner should not have to discover that distinction after one side has been painted.
Corners can also collect heavy old compound from earlier repairs. A bulky transition may be an appearance issue, a sign of repeated work or both. Assessment should separate the shape of the existing finish from the condition of its reinforcement. Sanding down every raised area without that distinction can expose tape or damage retained paper.
If the corner is near door tracks, fixed shelves or fixtures, show the access. Repairing and blending along two planes can need more working space than the narrow visible crack suggests. Clarify whether the final painting scope includes both adjoining surfaces, especially if a consistent appearance around the corner is important.
Cracks beside old patches need context
An old patch creates boundaries between new and retained material. A line through its centre differs from a line following its perimeter. Take a view wide enough to show the patch outline if visible, and explain what originally caused the opening. The estimator can then assess the repair rather than treat it as an untouched new-board seam.
Previous compound layers may make the wall look raised even where the new crack is fine. A suitable correction may need to address both the joint and the surface profile. Adding another narrow band can leave a more noticeable hump under paint even if the visible line is temporarily covered.
The recurring garage repair guide explains how to organize earlier scopes and photos. Keep the discussion focused on observed conditions and the proposed remedy. The appearance of a failed patch does not establish the skill or intent of the person who worked on it before.
When the board needs attention first
A joint finish cannot make an unreliable panel suitable by itself. Where there is visible detachment, serious damage or uncertainty about attachment, the board needs assessment before re-taping. The resulting scope may include appropriate corrections or replacement of a section, with the details guided by existing construction.
Do not add screws randomly along the crack. The location of support and concealed services must be understood, and attached garages may involve assembly requirements beyond surface appearance. A photograph can show the defect, but it cannot prescribe a fastening repair or confirm what lies behind the panel.
If the board is sagging, wet or changing shape, keep clear of the suspect area and arrange suitable review. The finisher may need information from another professional before defining the cosmetic work. A clean-looking joint should be the result of an appropriate repair decision, not a way to conceal an unresolved base problem.
What a re-taping repair can involve
Once the affected construction is suitable, the repair may include removal of failed material within the agreed boundary, joint preparation and installation of compatible reinforcement. Successive compound coats then shape a gradual transition. The exact preparation depends on the existing work and the manufacturer's material instructions.
Feathering gives the repaired area room to blend into the retained wall. A visibly short crack can therefore result in a wider finishing area. Ask the contractor to explain that relationship before assuming the repair has expanded unnecessarily. The reinforcement boundary and the final surface blend serve different purposes.
Sanding refines the prepared joint after suitable readiness checks. It should not be used to grind an unstable repair flat or remove enough surrounding paper to disguise a hump. If a surface needs further filling or reshaping, that should be addressed before primer rather than expecting paint to make the irregularity disappear.
Drying conditions affect the repair schedule
Garage finishing should be planned around suitable product conditions. Tell the contractor whether the space is heated, how often the door opens and whether other work introduces moisture. A schedule based on an interior room may need adjustment where the garage environment is different.
Setting time is not the same as full drying or readiness for decoration. A material can harden while moisture remains, and thick corrections may progress differently from thin finishing coats. Ask for the sequence of visits and the conditions that would change the painting date rather than a promise based only on a bag label.
Do not improvise building-system changes to accelerate the job. The appropriate work window and conditioning should be discussed with the contractor and relevant trades. It is more useful to allow a realistic interval than to coat a repair because the calendar says the painter must arrive that morning.
Decide how the repaired wall should look
Some homeowners want a sound local repair and accept the surrounding utility finish. Others want the full visible wall improved before painting. Both can be discussed, but they are different scopes. Specify whether the quote includes only the cracked joints or also rough fasteners, old patches and broad surface smoothing.
Paint and lighting influence the appearance target. A repaired seam beside strong side light can be more visible than the same transition under even illumination. Explain the intended decoration before the last finishing stage. A representative sample may help when expectations or coating choices are demanding.
Do not assume that a higher finish label will prevent the original cause of cracking. A whole-surface skim changes surface treatment; it does not stabilize movement or correct compromised board. Essential joint repair and optional appearance improvement should remain distinct decisions even when the same crew completes both.
Protection, primer and final review
A crack repair still produces preparation and sanding work around belongings. Agree on vehicle removal, storage protection and household access. EPF uses HEPA-supported dust-controlled sanding where appropriate, together with containment and cleanup. Dust collection reduces spread but does not make the garage a dust-free work area.
Before primer, inspect the prepared joint for obvious ridges, damaged paper, exposed tape and unfinished transitions. Primer can reveal smaller defects that need correction. Decide who performs that review and who handles any touch-ups, especially if a separate painter will finish the garage.
Painting may need to extend farther than the repaired seam. An old coating can differ in colour or sheen from a new touch-up. Agree on the natural decorating boundary and inspect under the intended room lighting. An acceptance discussion should concern the actual use of the garage rather than an unspecified promise that no line can ever be visible from any angle.
Compare quotes using the same observations
Give each contractor the same photographs, dimensions and crack history. Ask them to identify whether the proposal includes investigation, joint rebuilding, board correction, surface finishing and decoration. A lower total may reflect fewer stages rather than a more efficient version of identical work.
Where the cause remains uncertain, ask what needs to be established before the quote can be confirmed. Keep unresolved items visible in your comparison instead of assuming they are covered by a general phrase such as complete repair. The scope should explain how additional findings will be reviewed before more work is undertaken.
The garage repair cost factors guide can help organize those questions. Floor area alone does not describe the number of affected joints, corners, access constraints or previous repair layers. A written repair scope provides a more useful basis for choosing the work than a generic square-foot rate.
Prepare your garage seam repair request
Send your city, full wall and ceiling views, close-ups of each line and approximate heights. Include previous repair information, any known moisture history and access restrictions. Mark which defects are essential to repair and which surrounding appearance concerns are optional.
If the same crack has returned, explain the timing and location. If another trade still needs to work in the area, include that in the schedule. EPF can use the information to discuss the assessment needed and the appropriate order of work before a final coating is applied.
The quote form accepts your project description and a photo link if available. You can also state that you have photographs to share. The useful next step is a repair plan based on the joint and its context, with a clear finishing handoff, rather than another unsupported guess about why the line appeared.
Planning this repair in Hamilton
State the community and postal code in your Hamilton enquiry so the property location is clear. For a seam that has cracked again, add previous repair dates if known and photographs showing the full joint. The repair assessment depends on the board, joint and moisture conditions at the property, not its neighbourhood.
EPF serves all Hamilton neighbourhoods. Review Hamilton garage repair coverage and neighbourhoods, then include your location with the repair details when requesting an estimate.
FAQ
Does a straight garage seam crack identify its cause?
No. Location helps describe the issue, but joint condition, board and repair history need assessment before a cause is established.
Can a seam crack simply be filled?
A limited surface defect may need a small correction. Failed reinforcement or an unreliable base requires a different repair.
What history helps assess a recurring garage crack?
Record when it appeared, previous repairs, where it returned and any relevant moisture or later trade work. Pair dated close-ups with full-wall views.
Will a full skim prevent garage cracks?
A skim changes surface treatment. It does not stabilize movement, restore failed tape beneath it or resolve compromised board.
Field Photos
What the Work Can Look Like
Article Review
AuthorEPF Pro Services
Reviewed byEPF Pro Services
UpdatedSeptember 11, 2026
Plan your drywall scope
Get a drywall quote today
Share photos, room sizes, and timing. We reply the same day with GTA drywall availability and a clearer written scope.
Quick next step