
Why Is My Garage Drywall Tape Peeling? (2026 Guide)
Updated September 11, 2026
Peeling tape can signal a failed bond, but the board and surrounding joint need assessment before the repair is chosen. Covering a detached strip does not rebuild that bond.
- Trusted since 2005
- Fully insured
- Dust-controlled sanding
- Paint-ready finishing
- 3-year workmanship warranty
Quick Answer
Peeling tape can signal a failed bond, but the board and surrounding joint need assessment before the repair is chosen. Covering a detached strip does not rebuild that bond.
Garage drywall tape can peel when its bond to the joint fails, but the visible flap does not tell you why it failed. The board may still be suitable for repair, or it may need attention before new tape is installed. A sensible first step is to document the affected area and have the joint assessed rather than simply painting or mudding over it.
EPF's garage drywall repair service covers assessment, re-taping and finishing of suitable wall and ceiling areas. This guide explains what homeowners can observe, how a repair boundary is chosen, and what should be clear in an estimate. It is not a diagnosis of concealed construction or a promise that all peeling tape has the same cause.
Start with the condition you can see
Use these observations to prepare the assessment, not to diagnose concealed construction. Pair each detail photograph with a wider view so the repair area, adjoining surfaces and access are clear.
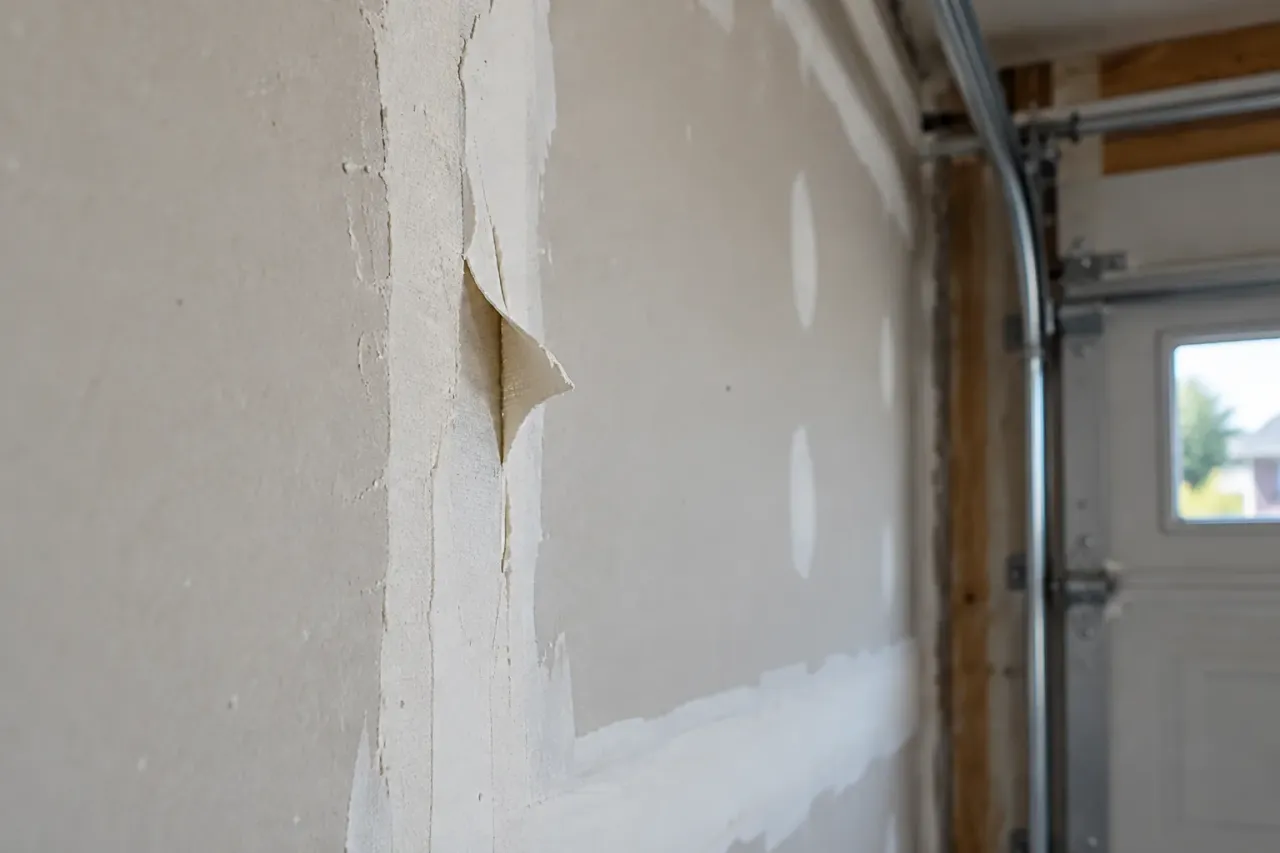
Loose paper edge
Have the tape bond and the surrounding joint assessed.
Ridge with no detachment
Distinguish surface shaping from failed reinforcement.
Wet or loose board
Resolve the condition before cosmetic finishing.
Is it tape, paint or torn drywall paper?
Homeowners use peeling to describe several different appearances. A narrow strip along a joint may be reinforcement coming away from its bedding. Flaking paint may lift from an otherwise intact surface. Damaged board paper can also curl after impact or an earlier attempt to remove coating. These conditions can look similar in a close photograph, but the preparation they need is different.
Look at the location without pulling on the material. Does the affected strip follow a straight board joint? Is the surrounding coating also lifting? Is it beside an impact mark or old patch? Take a full wall view and then a closer image. The broad view helps the finisher place the defect in context instead of deciding from the shape of one loose edge.
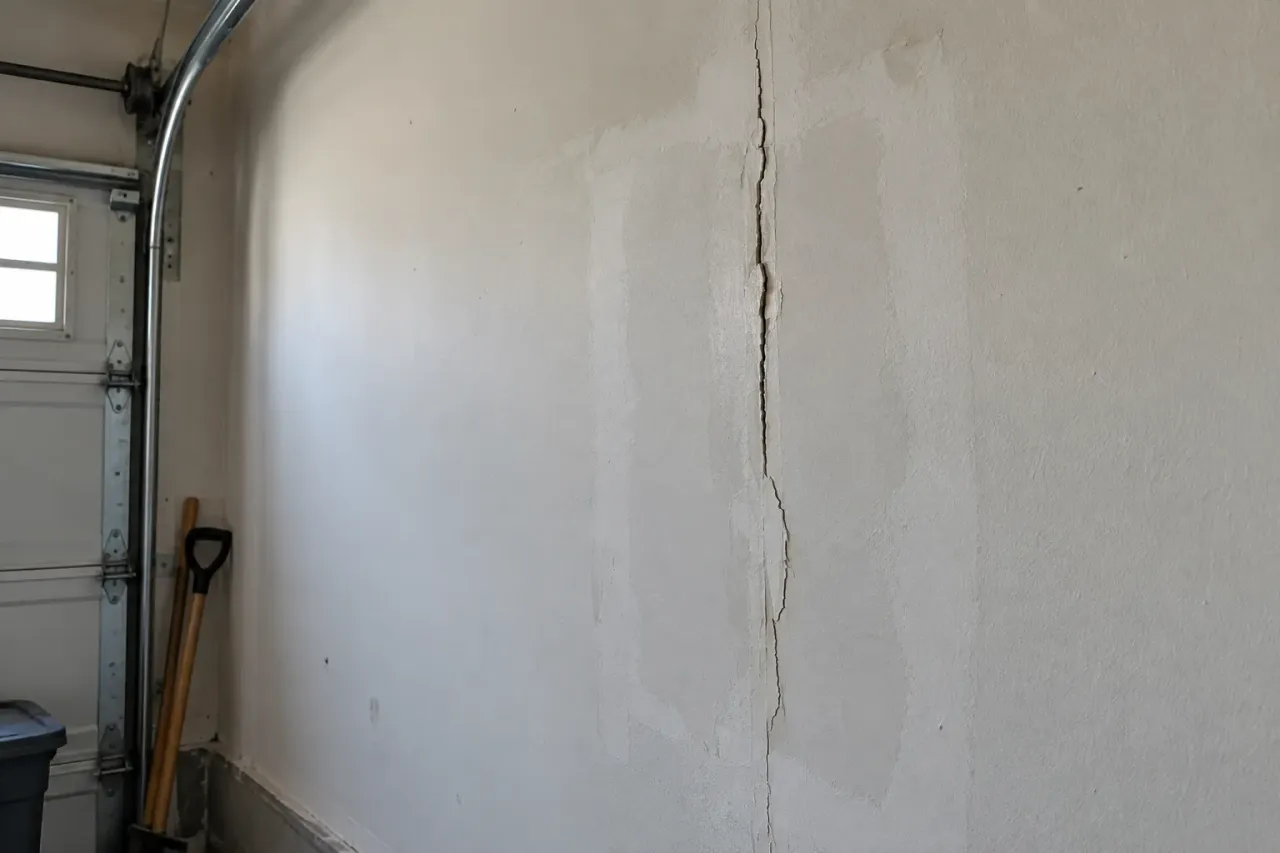
A raised line that remains attached is another possibility. It may be a ridge in the finished joint rather than loose tape. An assessment should distinguish an appearance correction from failed reinforcement. That distinction matters because unnecessary removal can create more work, while covering genuinely detached material leaves the original weakness beneath the new finish.
What a failed tape bond can mean
Tape is part of a joint-finishing system. Its performance depends on the suitable materials, preparation and application beneath and around it. Insufficient contact, unsuitable surface conditions or a previous repair can contribute to separation. The correct explanation needs evidence from the affected joint, not an assumption that every curled edge was caused by the same shortcut.
The surrounding drywall matters just as much. If the board is loose, damaged or affected by moisture, replacing tape alone may not create a suitable base. A joint can also be subject to conditions beyond the finishing contractor's scope. Record observations plainly and let the assessment determine what work is appropriate before committing to a decorative upgrade.
Avoid choosing a repair solely because a product promises strong adhesion. Materials must suit the joint and the conditions in which they will be applied. A new layer cannot be more dependable than the surface carrying it. The quote should explain the preparation as well as the visible final coating, even if the homeowner does not need a detailed list of every finishing tool.
Why the garage environment belongs in the conversation
A garage may be unconditioned, intermittently heated or opened frequently to outdoor air. Tell the contractor how yours is used rather than assuming it behaves like an interior room. Temperature, humidity and application thickness influence drying and product readiness. The relevant manufacturer's requirements should guide the work window and the next stage.
That does not mean seasonal weather proves the cause of existing tape failure. A peeling joint could involve several contributing conditions, and a photograph cannot separate them reliably. History is useful: note when you first noticed the strip, whether it changed after a moisture event and whether neighbouring seams are affected. Avoid turning a plausible explanation into a confirmed diagnosis.
If the garage has active dampness, staining that continues to change or soft material, have the source and affected construction assessed before cosmetic work. A heater, fan or fresh coat of primer does not establish that the problem is resolved. Finishing should follow a suitable repair base and appropriate conditions, not serve as a way to hide uncertainty.
What to record before requesting a repair
Start with a simple wall map. Label each affected area with a number and use the same number for its photographs. Note whether it is a wall joint, ceiling seam, inside corner or transition beside a door. Approximate affected lengths help, but do not treat the visible peel length as a final billable quantity before assessment.
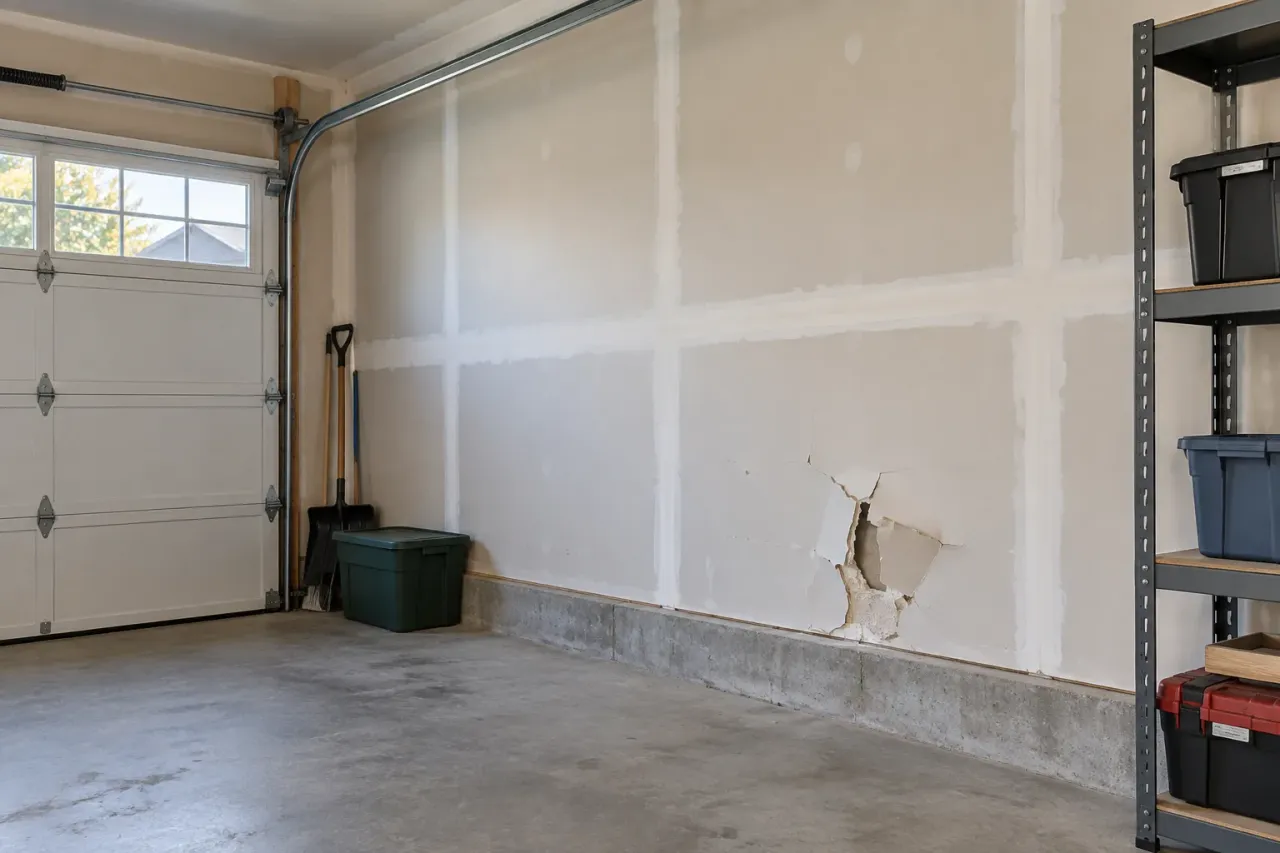
Include one photograph from the garage entrance and another showing the full affected wall or ceiling. Close-ups should be paired with those wider views. Show shelves, benches, lighting and door tracks that affect access. A clear photograph of the defect can still be an incomplete estimate brief if the contractor cannot see how the repair area is reached.
Mention whether the drywall has been painted and whether earlier repairs were made. If you know the old products, keep that information available. Do not guess a material name from its colour. Unknown product history is something the finisher can account for; incorrect certainty can make the initial scope less useful.
Should you pull off the loose strip?
Do not pull a hanging strip simply to see how far it goes before the area has been assessed. The action can damage sound adjacent finishing or reveal a larger unsuitable section. It may also remove evidence of where the failure began. Document the condition and let the repair boundary follow a planned assessment.
The same caution applies to aggressive sanding. Sanding may remove an obvious ridge, but it cannot restore adhesion beneath detached tape. It can also expose reinforcement or damage paper that would otherwise be retained. If an old unknown material would need disturbance, obtain appropriate advice before sanding or removal rather than treating every garage surface as a straightforward modern repair.
Homeowner preparation is usually more useful when it improves access: clear movable belongings after agreeing what needs to move, keep the route available and gather the repair history. Avoid altering fixed shelves, door hardware or services without the appropriate help. A tidy estimate brief is more valuable than an improvised opening that changes the job before the contractor sees it.
How a local re-taping scope is established
The repair should extend to suitable material and allow the joint to be rebuilt and blended. Sometimes that means more than the short flap visible at first. Sound surrounding tape may remain when appropriate, while failed material needs removal within a defined boundary. The finisher should explain the proposed extent without implying that every seam in the garage must be stripped.
Where the underlying board requires correction, that work comes before new reinforcement. The proposal may include damaged edge preparation, appropriate board repair or replacement of a compromised section. Those are not merely extra coats of mud. They should be identifiable in the estimate so the homeowner understands why a joint repair can involve more than its surface appearance suggests.
The re-tape or replace comparison explores that decision in more detail. It is useful when one contractor proposes local re-taping and another proposes board work. Compare the assumptions about the retained material and the final handoff, rather than deciding only from the size of the repair described in the headline.
What happens after the failed material is addressed
On a suitable base, the joint can be prepared and reinforced using a compatible finishing system. Successive coats shape a gradual transition into the surrounding surface. Corners and fasteners may need related work where they fall within the agreed scope. The objective is a sound repaired area prepared for the chosen decoration, not the greatest possible number of coats.
Drying and readiness checks occur between appropriate stages. Setting compound can harden before it is ready for every subsequent operation, and drying products depend on actual conditions. The contractor should follow product instructions and assess the surface rather than promise that a labelled setting interval equals the elapsed repair time. A small joint may still involve several work visits.
Sanding is the refinement stage. It should remove minor ridges and tool marks without tearing retained paper or exposing tape. A depression needs appropriate correction instead of more sanding. Before primer, the surface also needs suitable dust removal and review, with any unresolved area handled before it disappears beneath the coating.
A wall repair and a ceiling repair are not equivalent
An accessible wall joint may allow straightforward protection and a clear blending area. The same length on a ceiling can involve door tracks, lights and limited working space. Include those conditions in the quote request. The labour is shaped by access and preparation, not only the length of the loose strip.
A ceiling with visible sagging or loose board requires assessment before routine finishing. Keep clear of a suspect area and arrange appropriate review. Do not stand beneath it to pull on the tape or alter garage door components to reach the joint. Door springs, tracks and related hardware should be handled by the appropriate specialist when changes are necessary.
If wall and ceiling joints both need attention, ask whether the inside corner connecting them is included. A quote that repairs the flat seam may not automatically address the corner or full ceiling paint. Listing the surfaces separately reduces confusion, especially when the homeowner expects one continuous finished appearance across several connected planes.
Decide whether you want repair or broader refinishing
A garage can have one failed seam and several sound but unattractive joints. Repairing the failed area does not automatically include improving every visible compound stripe. Ask for the necessary repair and any appearance upgrade to be distinguishable. That lets you choose a useful scope without treating utility finishing as proof that all existing work must be replaced.
A localized repair may leave the surrounding wall in its current condition. Broader refinishing can include reshaping sound joints, blending patches or smoothing selected surfaces before paint. The chosen finish depends on lighting and decoration. A full skim coat is not a substitute for repairing loose tape first, and not every garage benefits from the same level of surface treatment.
If only one wall is being upgraded, identify its boundaries and how it meets retained surfaces. Corners and doorway returns can provide clearer stopping points than an arbitrary line in the middle of a wall. Discuss those details before comparing quotes so each proposal describes an outcome you can actually inspect.
Plan protection and the painting handoff
Garage repairs affect belongings as well as drywall. Vehicles, stored fabrics, tools and shelving can complicate containment. Agree on what moves out and which items remain protected. EPF uses dust-controlled sanding with HEPA vacuum support where appropriate, but collection does not eliminate dust or replace cleanup and controlled access.
Primer and paint should be included or excluded explicitly. A repair-only scope may stop at a prepared sanded surface. If another person handles coating, decide who checks for small defects revealed by primer and who performs corrections and spot priming. This avoids a homeowner being left between the finisher and painter after each assumed the other would handle the final adjustment.
Aged surrounding paint may not accept an invisible touch-up. Colour, sheen and surface texture can differ even when the patched joint is well finished. Consider painting to a natural boundary if consistent appearance is important. The board repair area, compound blending area and final painting area are related, but they need not be the same size.
What if the same tape repair fails again?
Keep a record of the original defect, the agreed work and the timing of any recurrence. A new loose edge beside a patch differs from a line reopening through its centre. Share those observations without assuming the contractor used the wrong material or that building movement must be responsible. The pattern should guide further assessment.
Repeated failure can mean the repair boundary did not address all unsuitable material, the base remained unreliable or another condition was unresolved. The guide to garage tape repairs that keep failing explains how to organize that history before another attempt. A repeat of the same cosmetic treatment is not a substitute for understanding what needs to change.
Ask what the next proposed repair will address that the earlier one did not. The answer should identify an observed condition, suitable preparation or additional investigation. No finish coat can guarantee the future behaviour of concealed construction. Clear scope and documented review are more useful than a blanket promise that the joint can never move again.
Prepare a useful quote request
For a garage tape assessment, provide your city, approximate wall and ceiling heights, the numbered defect photos and a description of access. Tell EPF whether you want a local repair, selected-wall improvement or a more complete refinishing scope. Include the desired handoff: sanded, primed or painted.
The garage repair estimate guide explains why floor area alone does not price failed seams. Protection, return visits, board corrections and decorating can matter as much as the visible tape. Ask for a written total with exclusions identified rather than applying a new-drywall square-foot rate to a repair it was not intended to describe.
Use the quote form to describe your garage and mention that photographs are available, or include a photo link in the project details. EPF can then confirm the assessment needed and discuss a repair that addresses the affected joint before improving its finish. You do not need to remove material first to make that conversation useful.
Planning this repair in Mississauga
Include your postal code, nearest intersection and whether the garage is attached or detached. For a peeling joint, show both the lifted edge and the full wall. Confirm vehicle and storage clearance so the estimate reflects the space available to protect, repair and finish the surface.
EPF serves all Mississauga neighbourhoods. Review Mississauga garage repair coverage and neighbourhoods, then include your location with the repair details when requesting an estimate.
FAQ
Can I paint over peeling garage tape?
Paint does not rebuild a failed tape bond. Have the affected joint assessed and repaired before coating it.
Does a short flap mean only that small piece needs repair?
The suitable repair boundary may extend beyond the visible flap. Assessment should identify sound material and the preparation needed around it.
Should I remove loose tape before asking for an estimate?
Photograph it first and leave uncertain material for assessment. Pulling or sanding can damage adjacent work and remove useful evidence.
Can solid garage board stay when the tape has failed?
It may be suitable to retain after assessment. Joint repair and board replacement are separate decisions based on condition.
Field Photos
What the Work Can Look Like
Article Review
AuthorEPF Pro Services
Reviewed byEPF Pro Services
UpdatedSeptember 11, 2026
Plan your drywall scope
Get a drywall quote today
Share photos, room sizes, and timing. We reply the same day with GTA drywall availability and a clearer written scope.
Quick next step